PayPeople helps to manage the data of employees very conveniently. It provides a precise and expanding application of data to help businesses make better decisions.
Different options are available for employee data like Employee Action, Separation and Settlement etc.
Make Increments or Promotion of Employees #
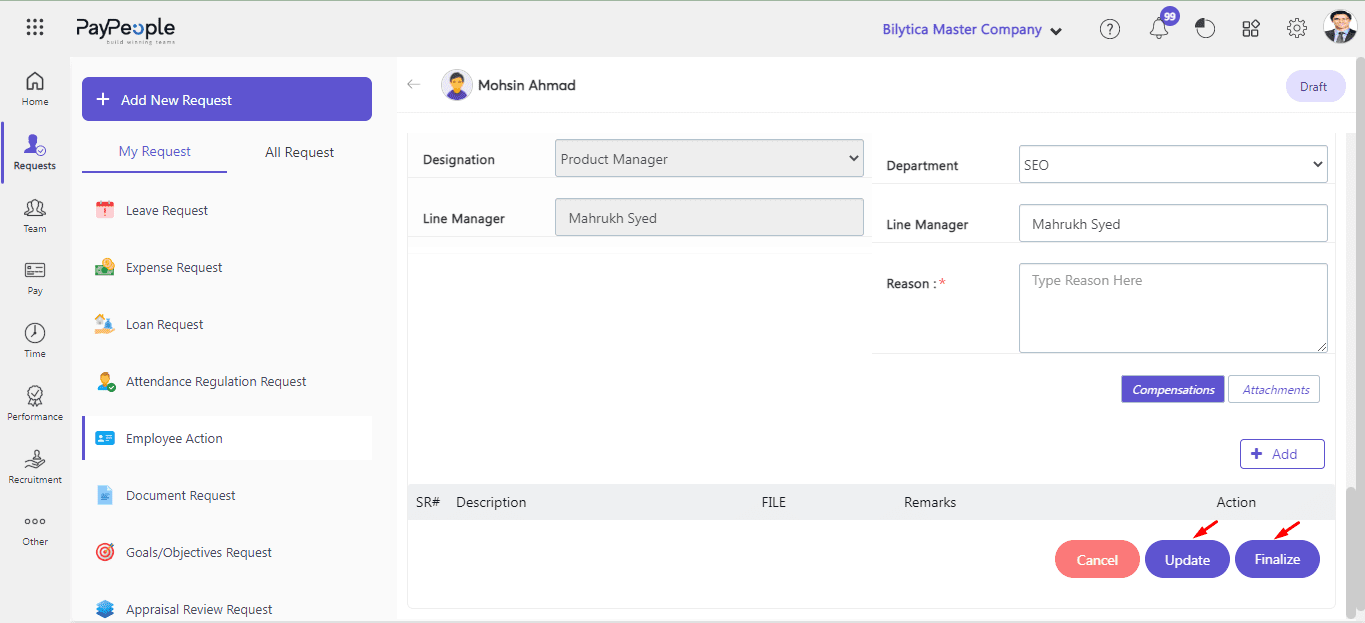
An employee action form is used to take any action that involves updating an employee’s information from previous information.
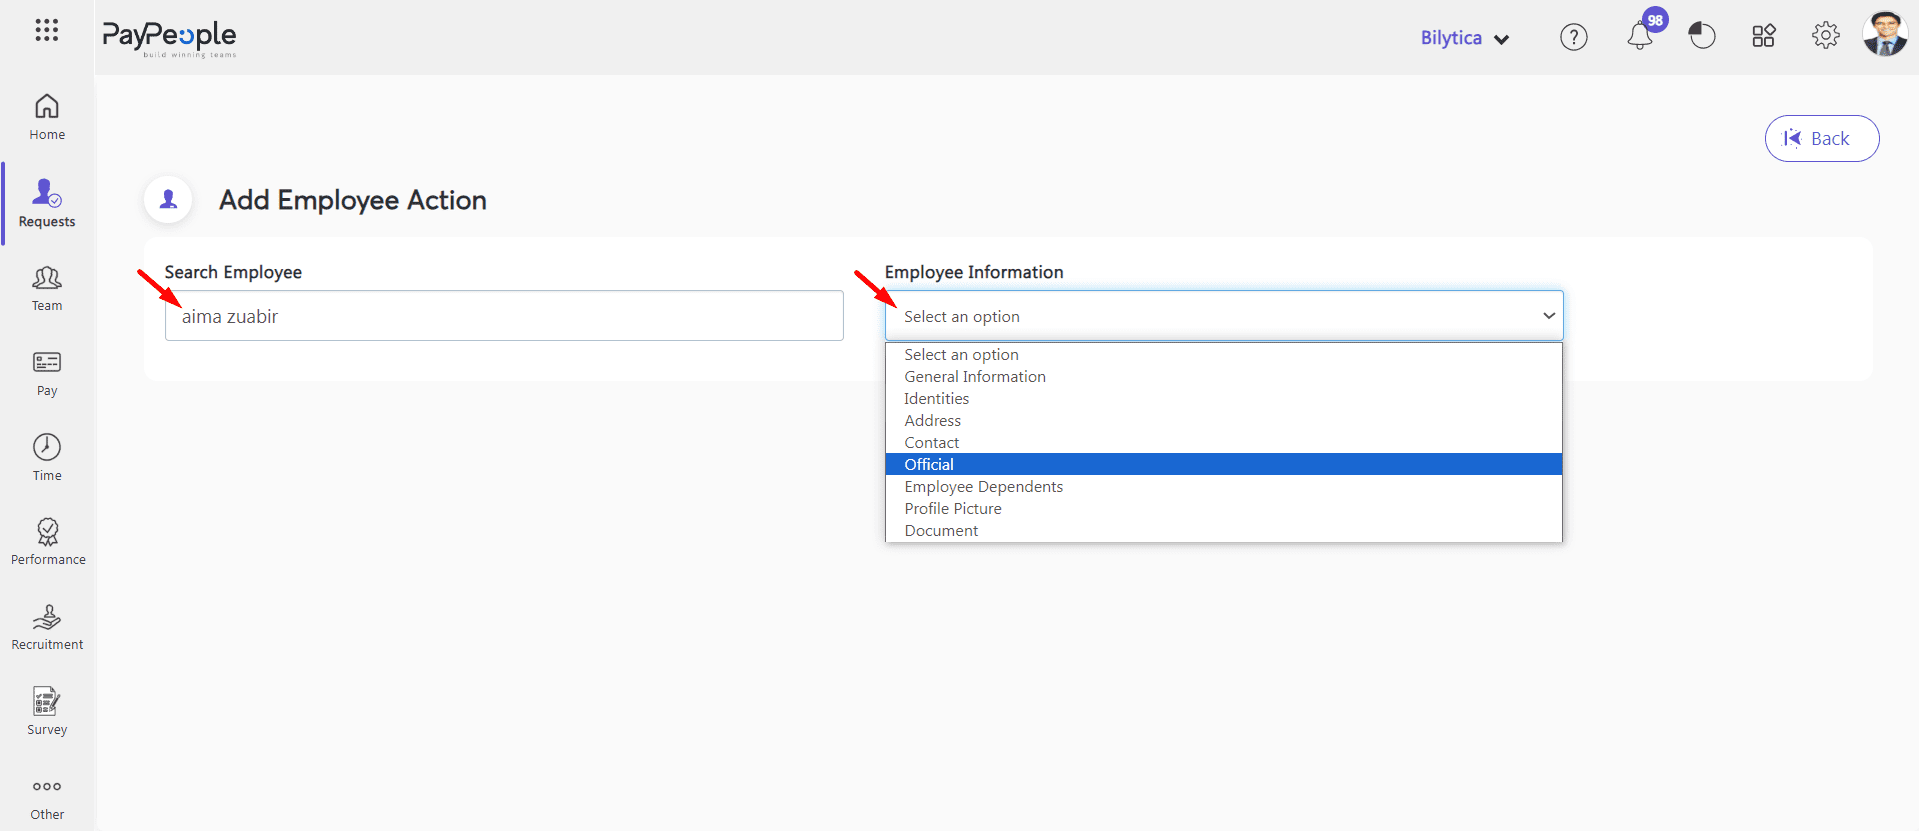
- Go to Setup > Requests > Employee Action
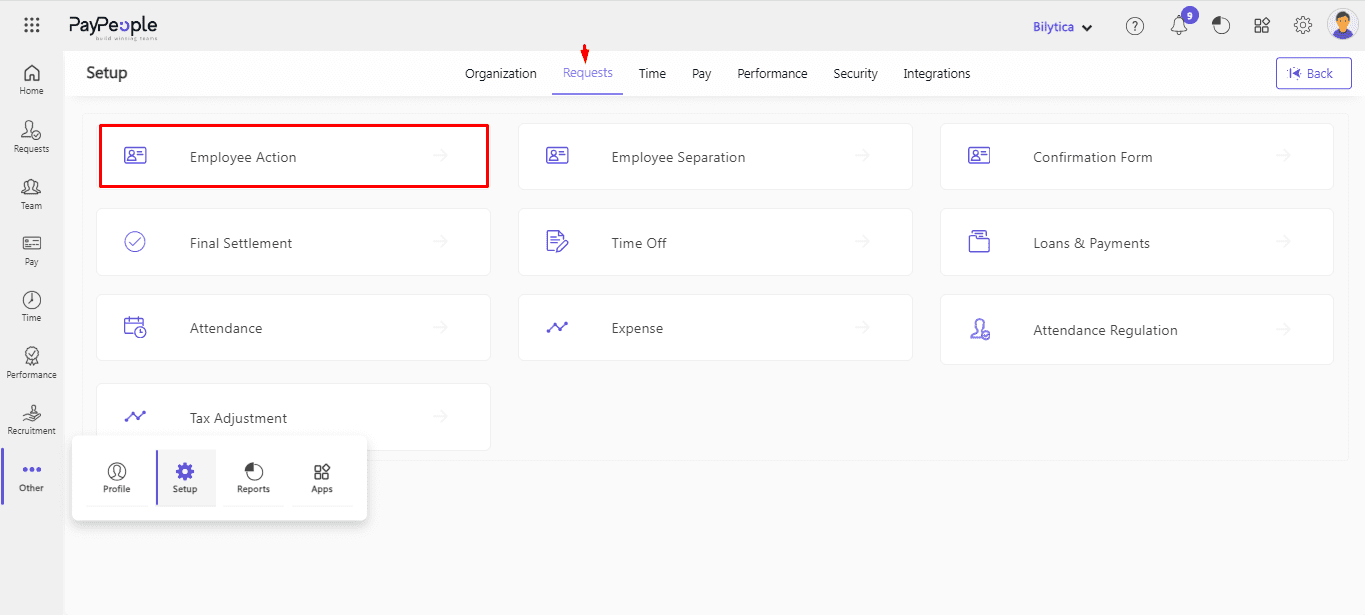
- Click Add New Request
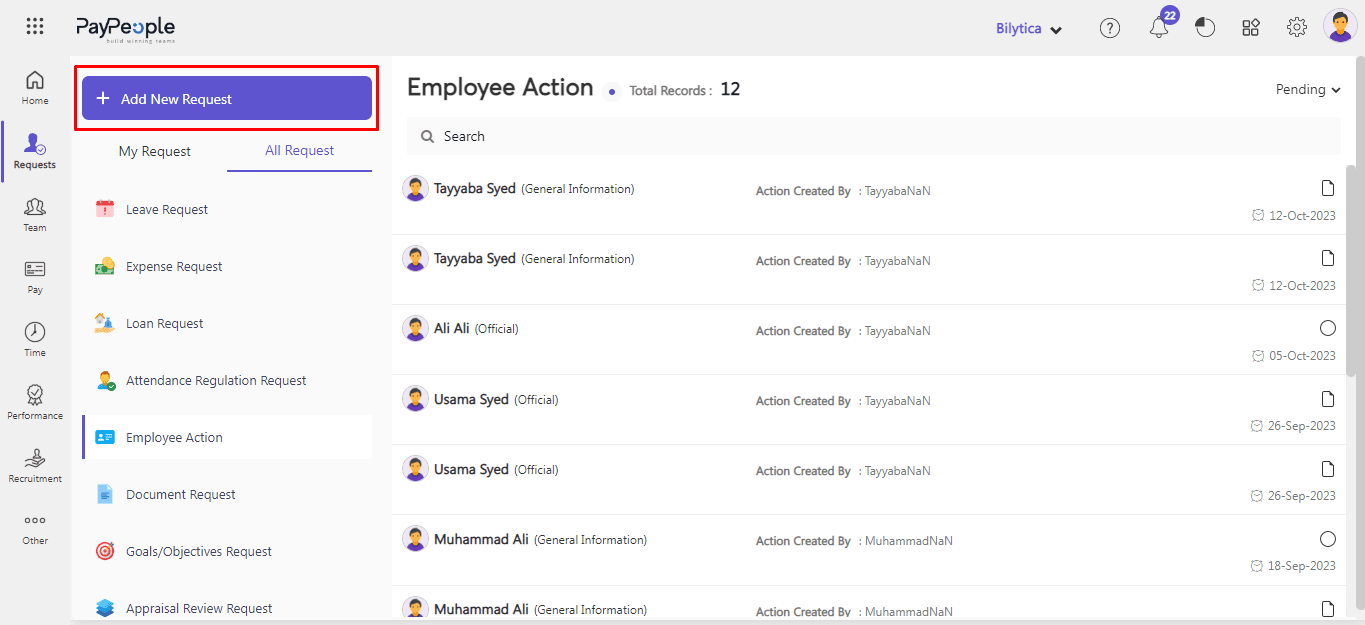
- Click Employee Action
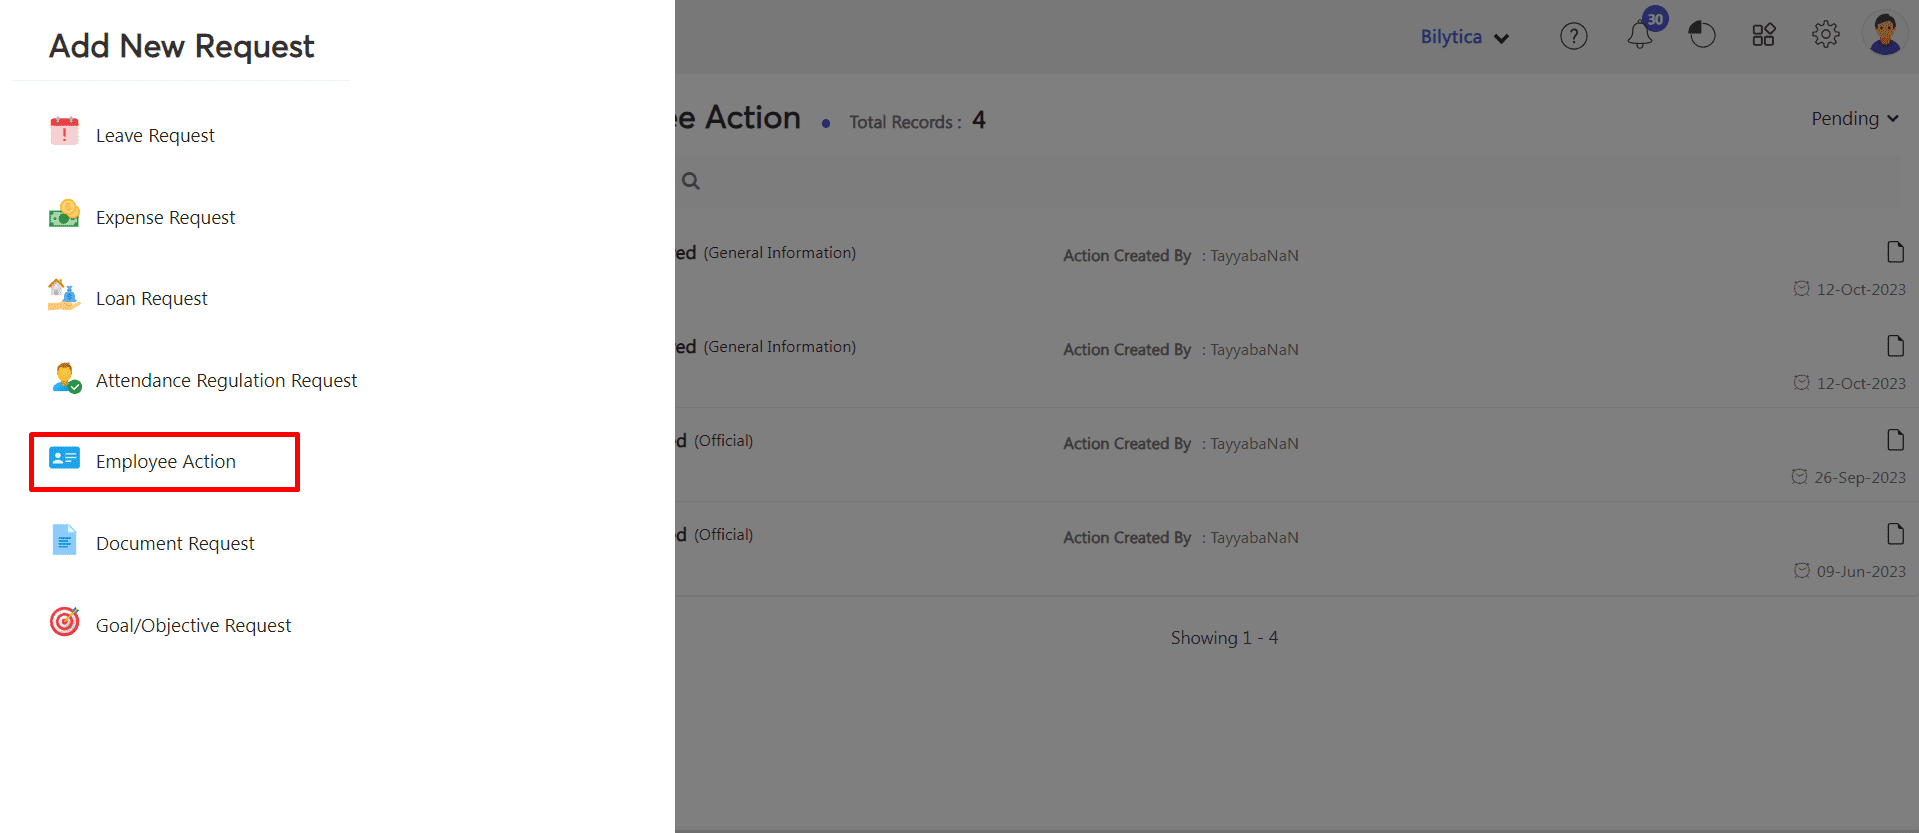
- A pop-up window will appear on the screen. Select Employee Name and Employee Information which you want to edit.
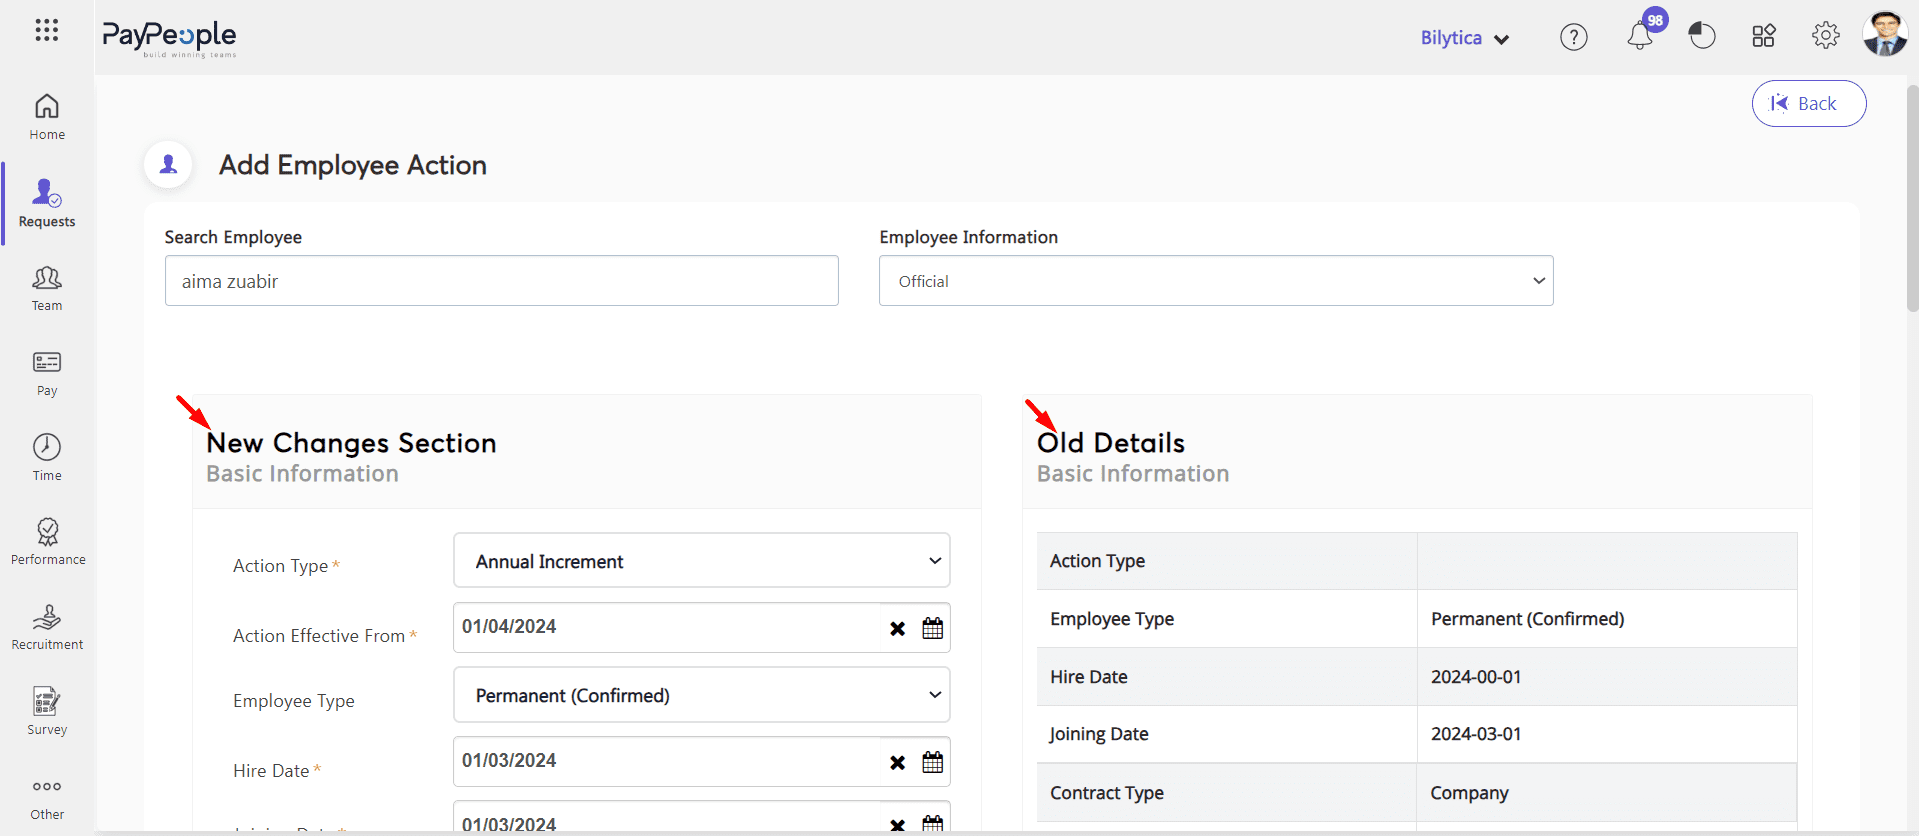
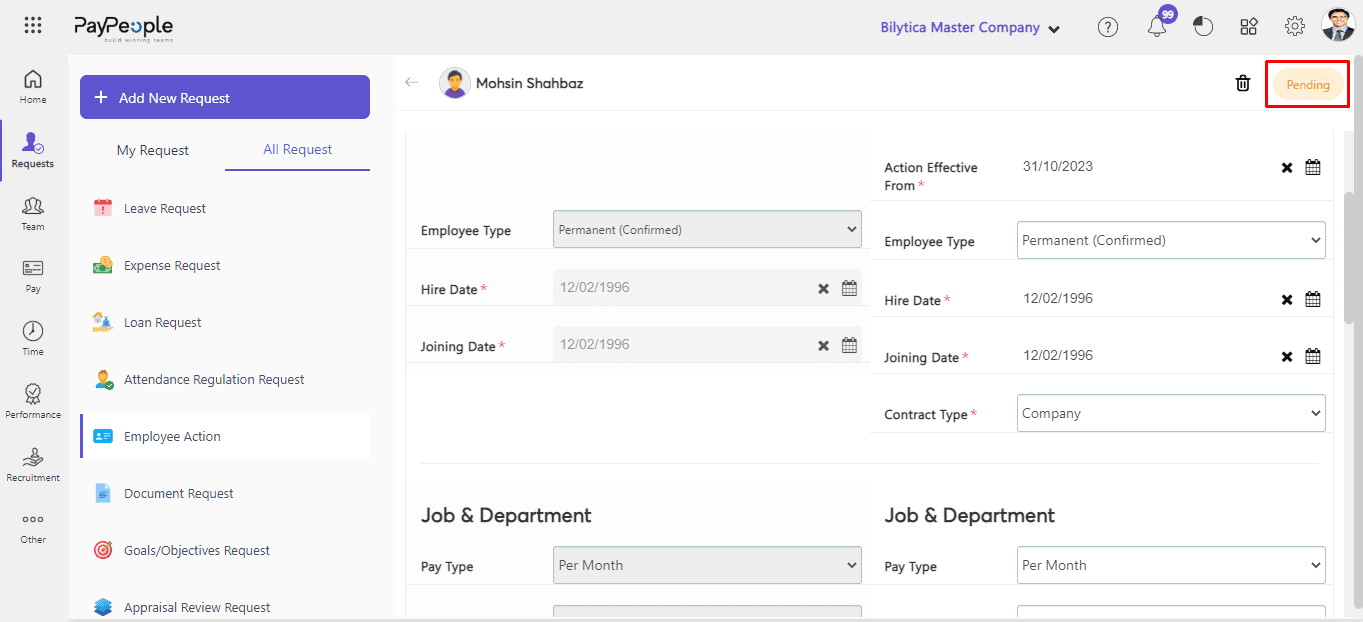
- Two section will be visible to you i.e Current Details and New Changes Section. In Current Detail you can examine an employee current details. In New Change Section you can change fields according to your needs or requirements.
- In the Current Details Section, you may examine an employee’s current details.
- On the other hand, you can view a segment of an employee’s New changes Section
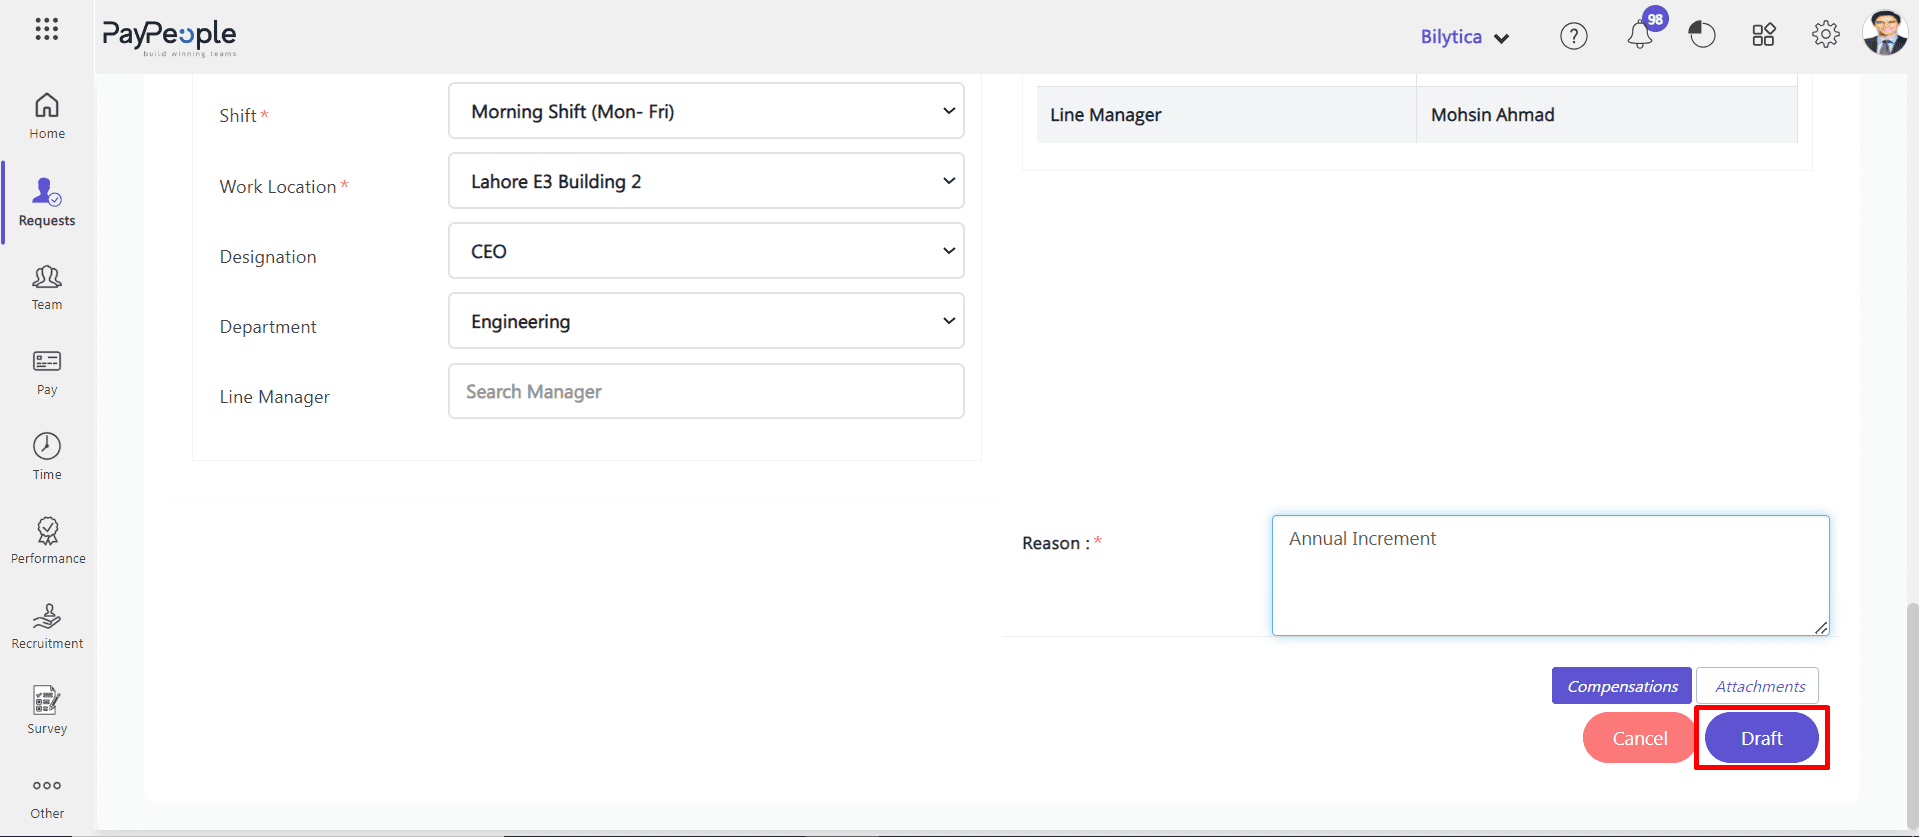
- Click on Draft Button. This request is in draft state where you can make changes according to your need again.
- Go to My Request > Employee Action > Click your draft request
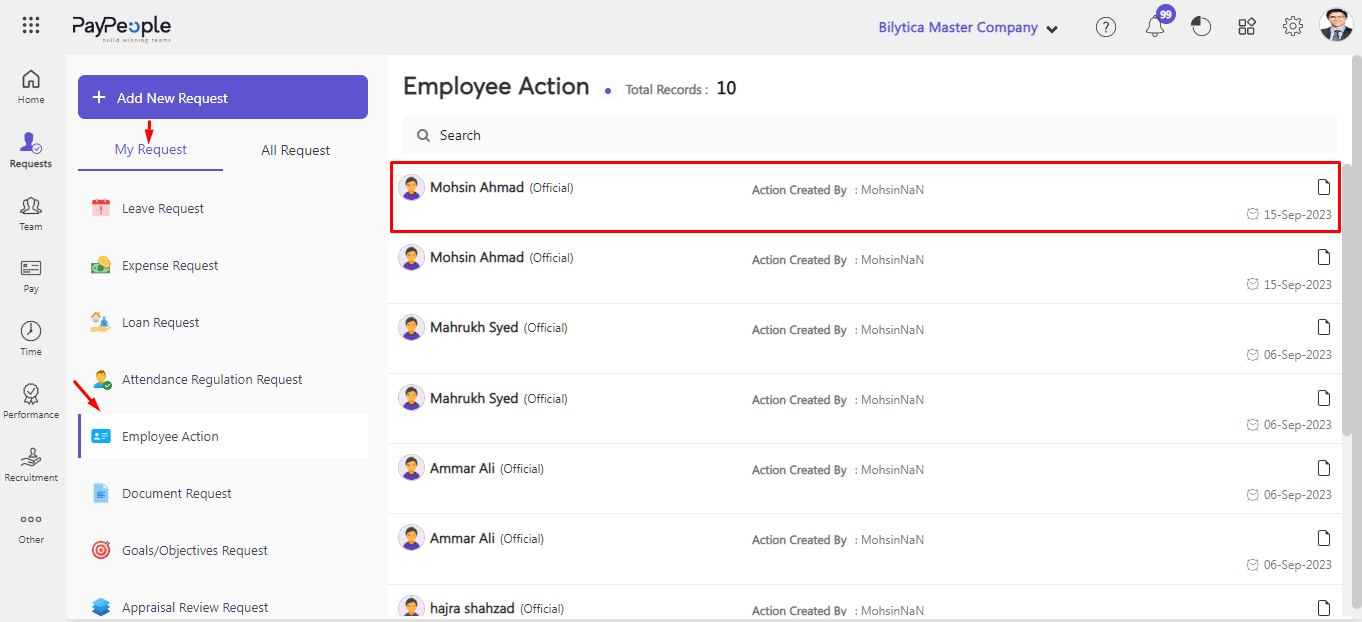
- If you want to edit something again, click Update button otherwise click Finalize button.
- After finalize the request will be visible on approver’s dashboard in pending task. Click on it.
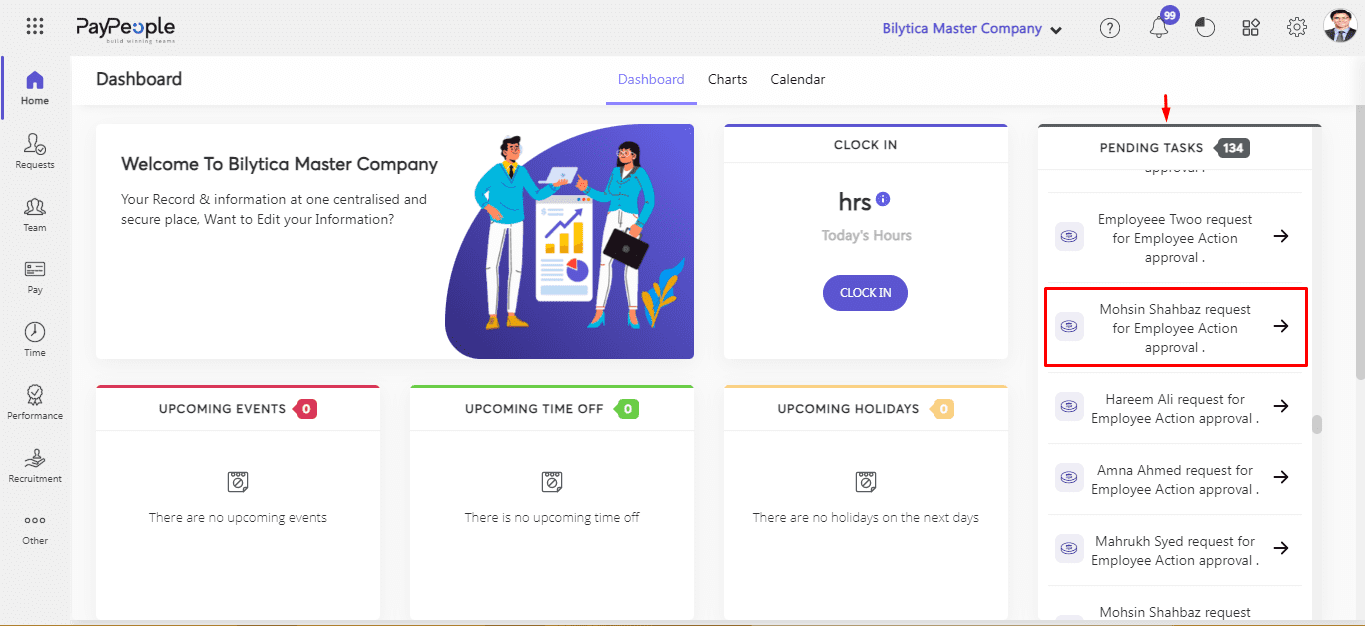
- He can reject and accept by click on Pending button..
Employee Termination #
Employee Separation #
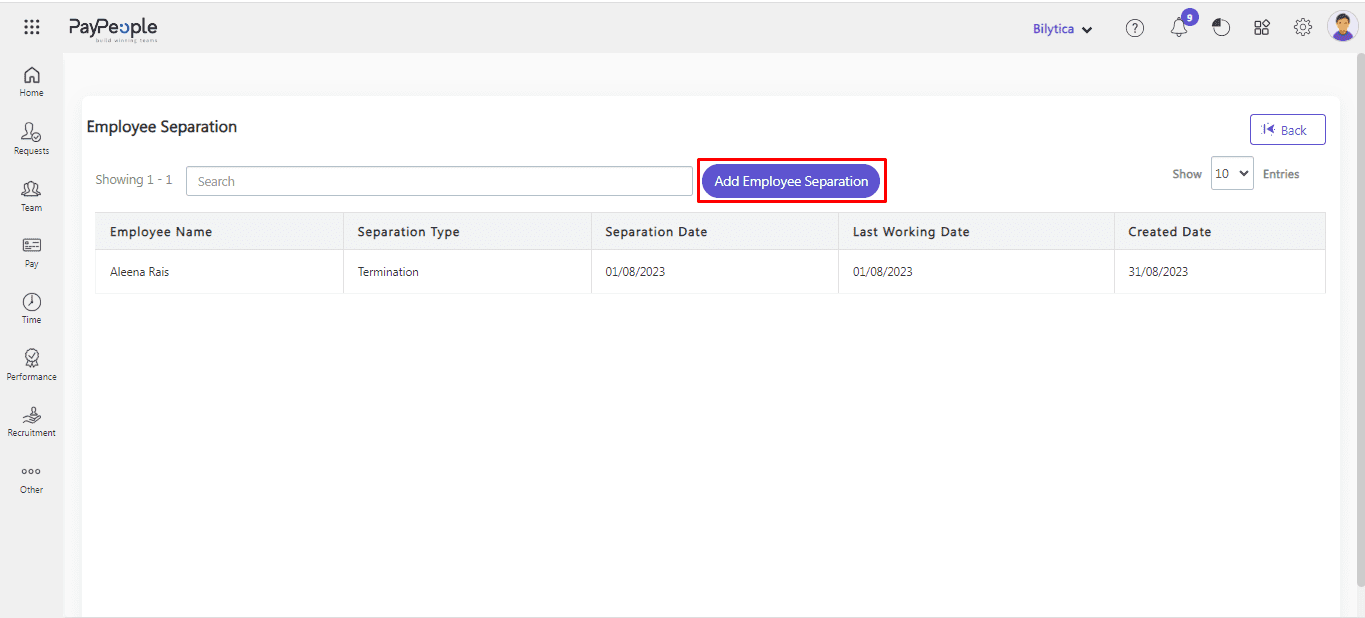
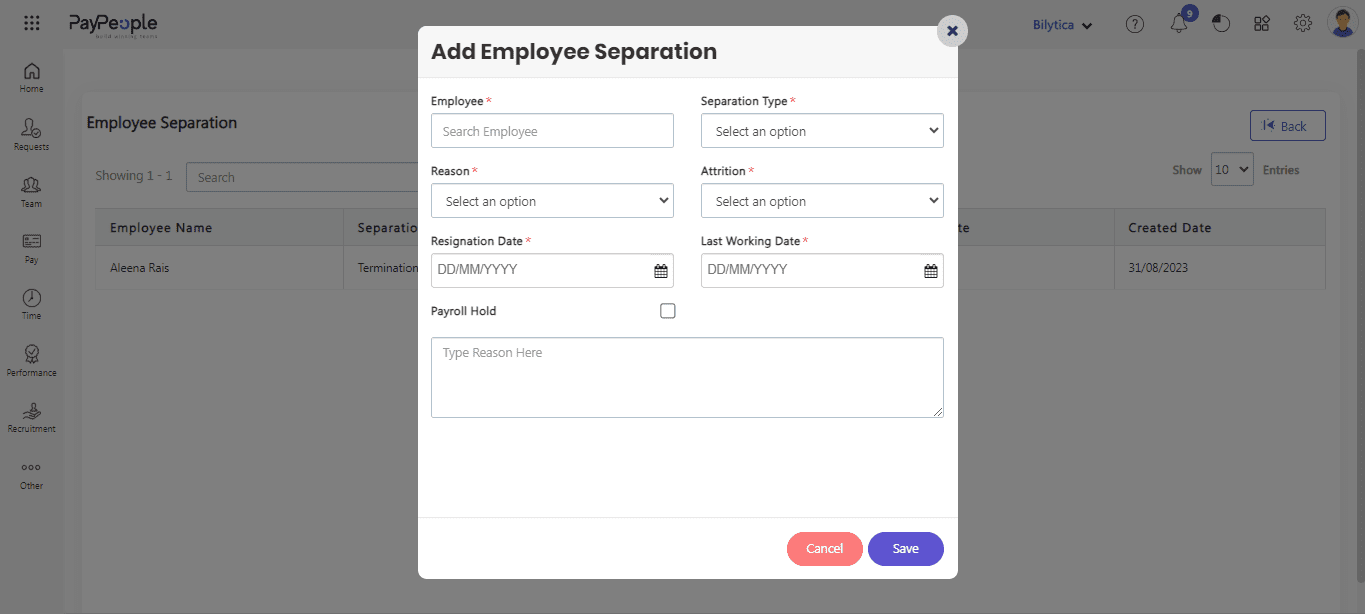
PayPeople also provides a module on Employee separation. If the employee is going to resign or you have to terminate the employee from the company you can add an employee separation.
- Go to Setup > Request > Employee Separation

- Click Add Employee Separation.
- Search for an employee.
- Add separation type, reason, and attrition of separation.
- Add the date of resignation and the last working day.
- Include the reason for the employee’s separation.
- Click Save button.
Note :
The employee will be deactivated from the team and user account will be deactivated also.
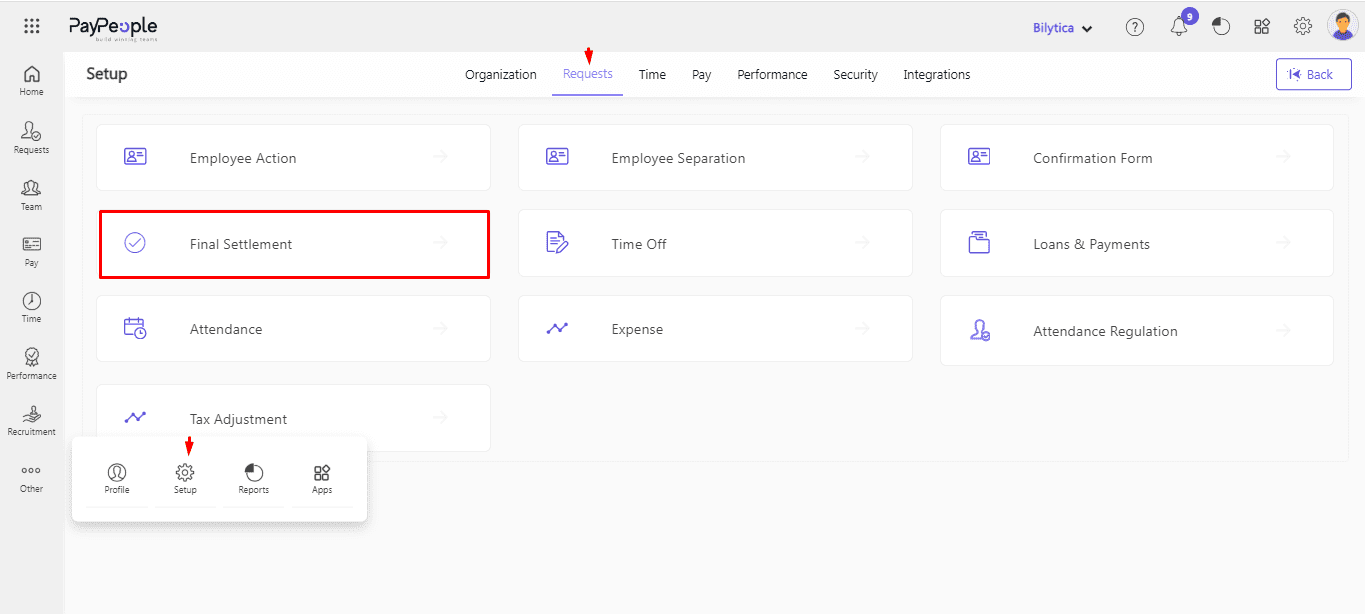
Final Settlement #
Creating an employee final settlement in Paypeople is a quick and easy process that ensures all dues and benefits are settled with the employee. Here’s how to do it:
- Go to Setup > Request > Final Settlement.
- Click on “Add Final Settlement” in the top right corner.
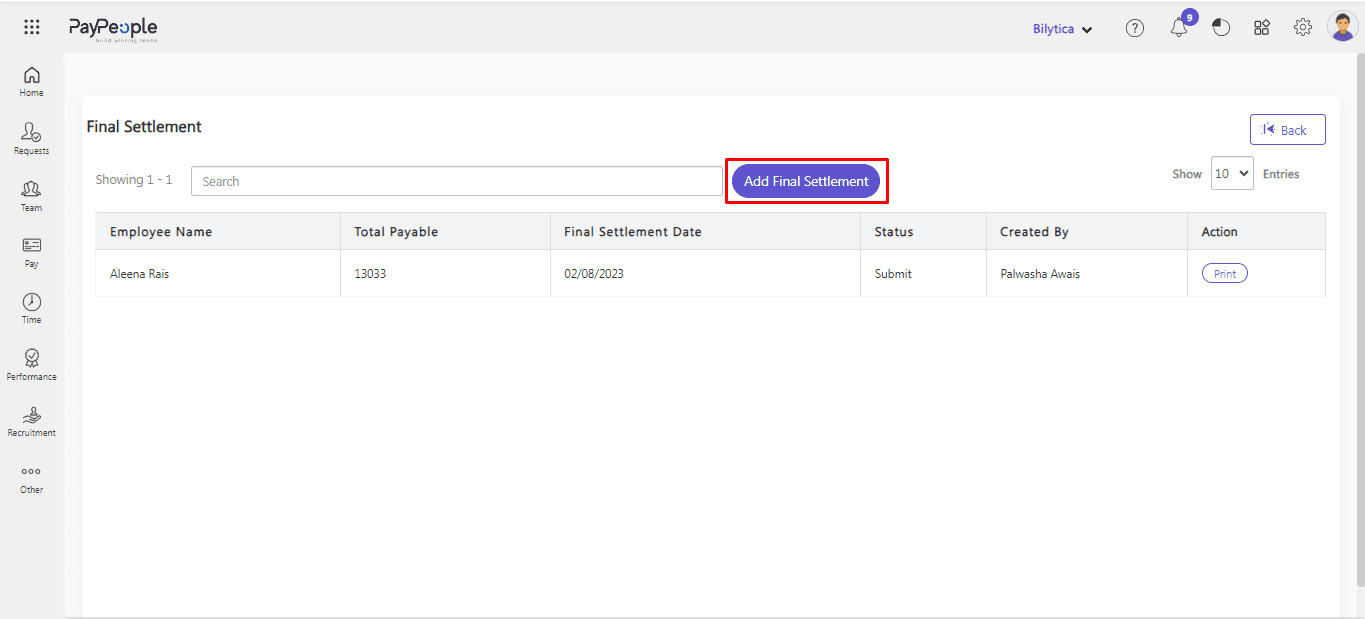
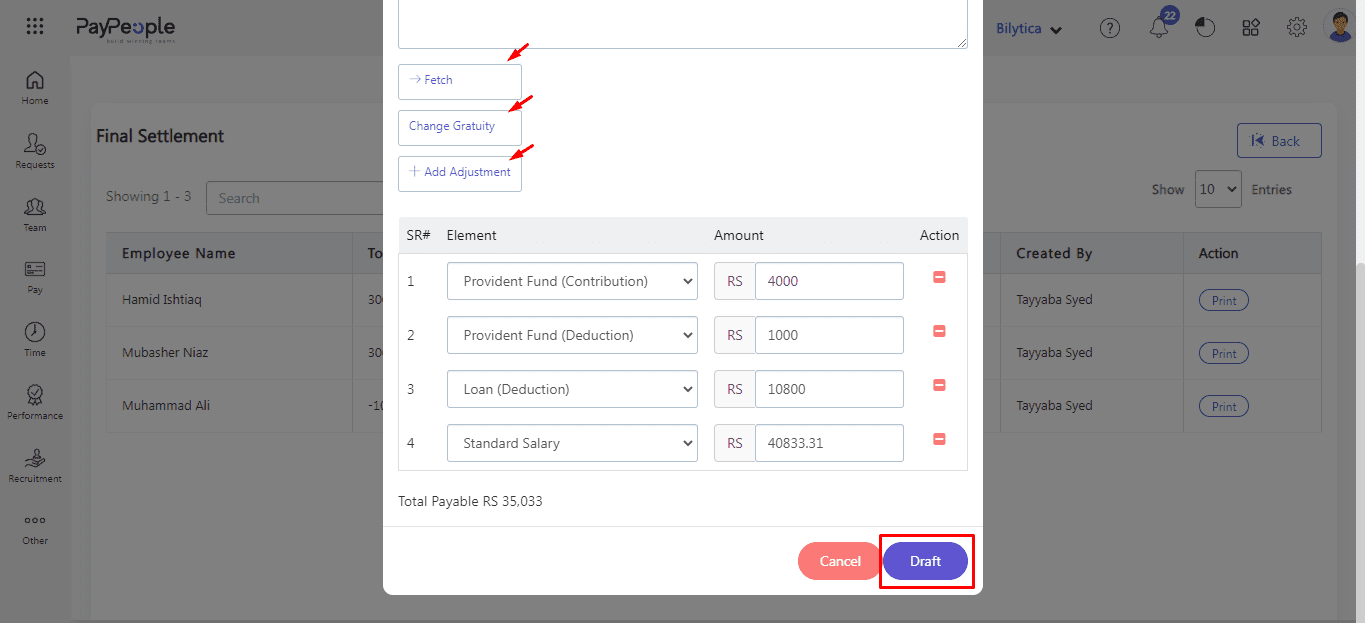
- Select employee from drop down. Only those employees will be visible in drop down list whose Separation has been created.
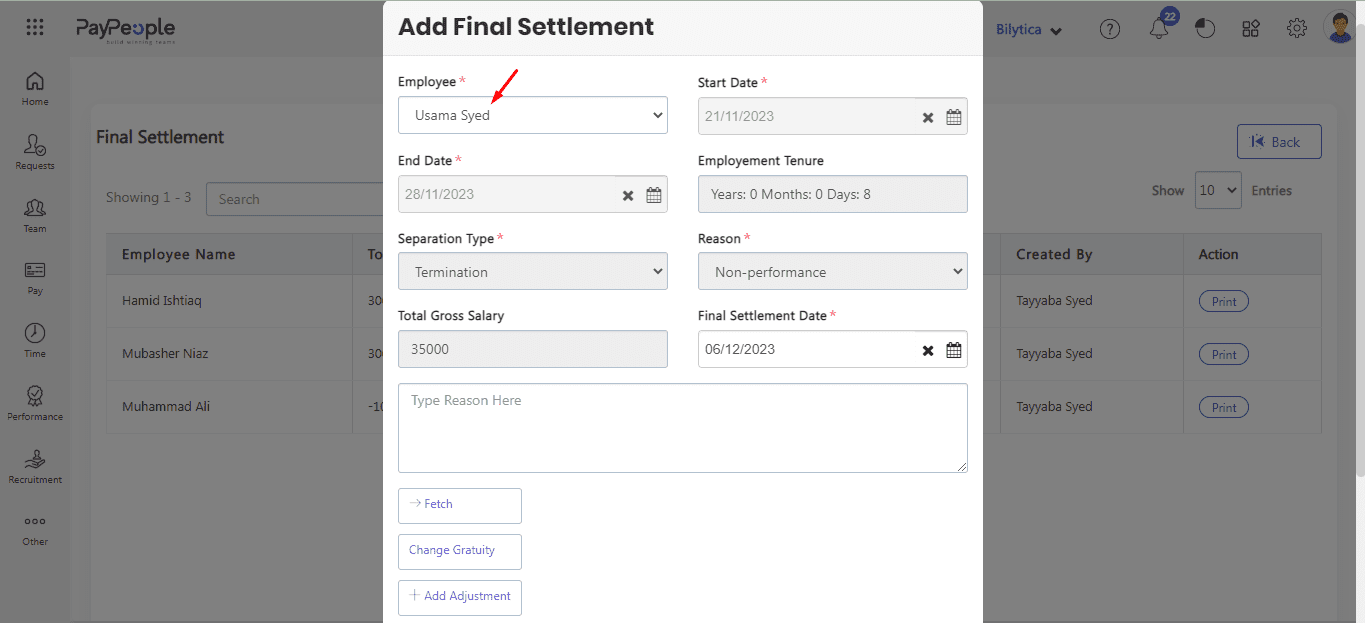
- Select final settlement date. After this you can fetch his basic salary by click Fetch button, you can also add allowances by click Add Adjustment button and you can change his gratuity by click Change Grauity button..
- Once you’re satisfied with the final settlement details, click on the “Draft” button to create the final settlement.
- Click your draft settlement. After you’ve finished drafting the settlement, if you make any necessary adjustments and click Update.
- When you’re satisfied with it, click the Finalize button.
- If you want to delete the Final Settlement Click on Delete once it is drafted.
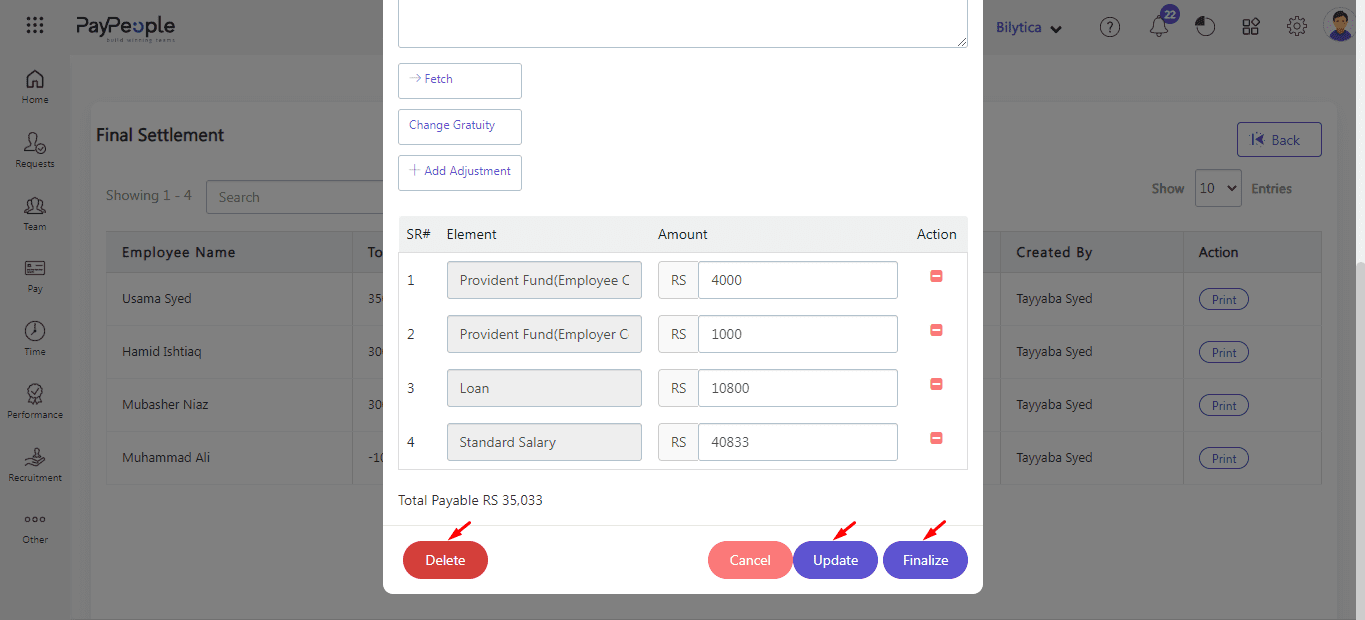
- You can print the full and final Settlement using the Print option on created settlement.

- After click, you can export the form in Excel Sheet.

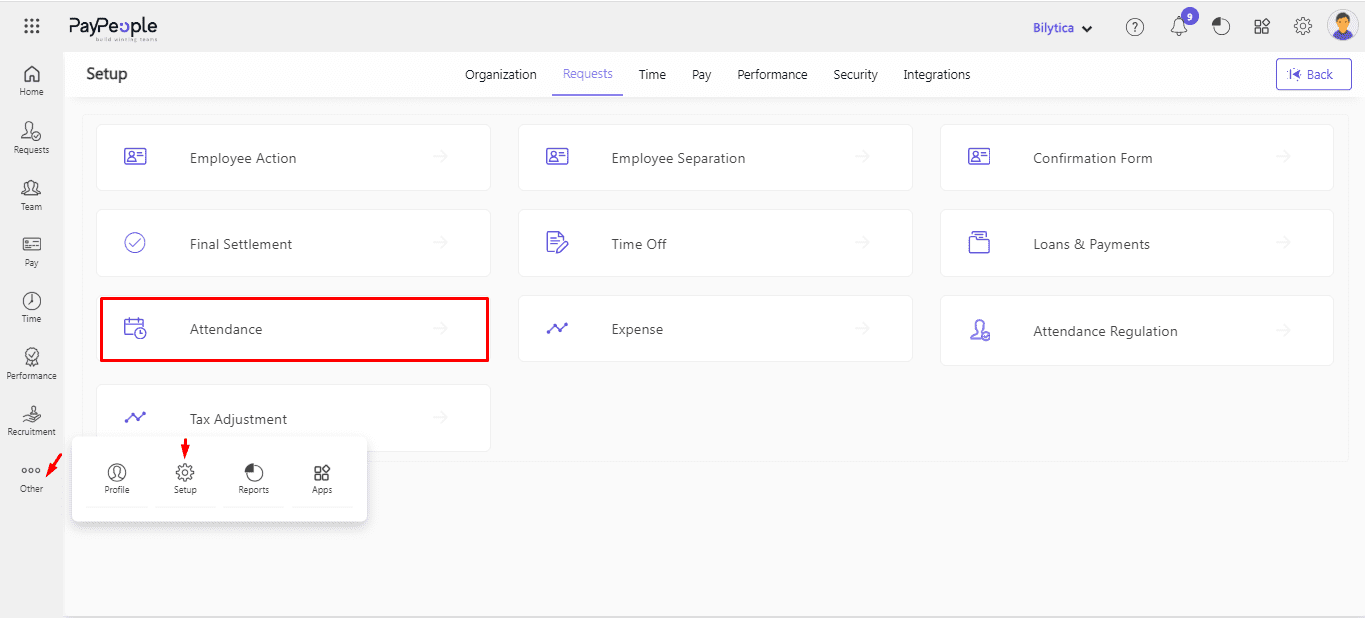
Attendance #
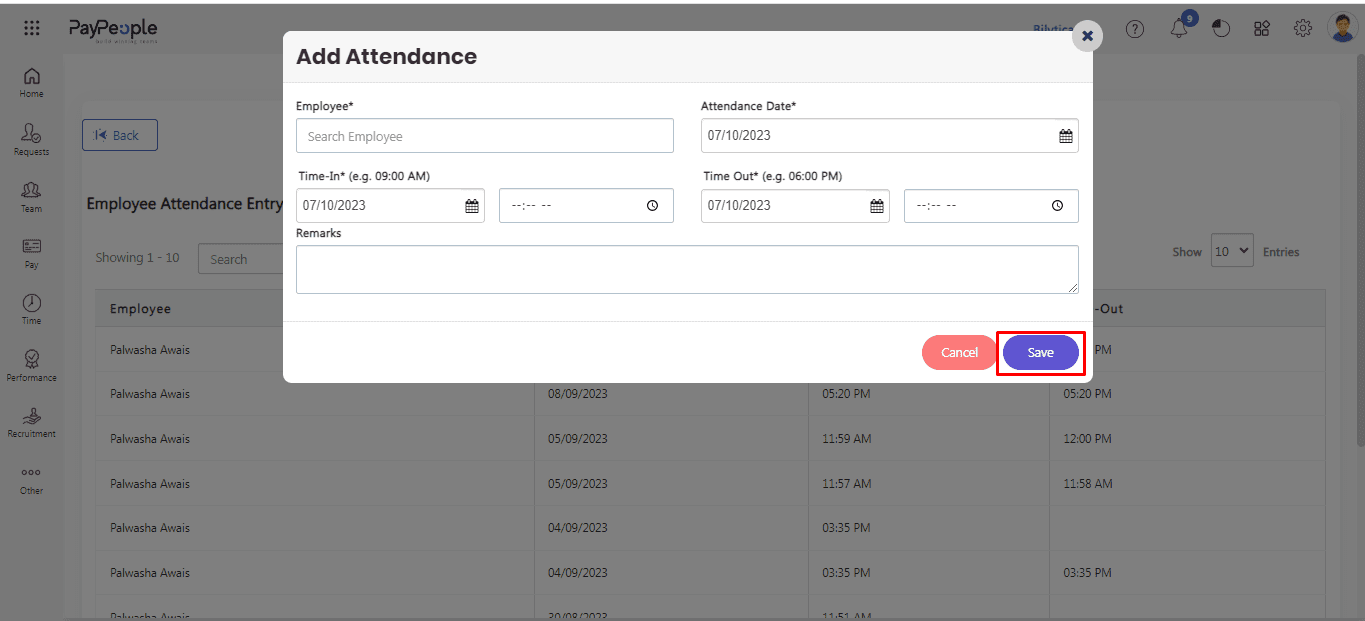
PayPeople provides an attendance module in employee data. You can Add, Edit, and Delete an employee’s attendance according to your requirements. Here’s how you can do it:
Add Attendance: #
- Navigate to the Setup > Request > Attendance Manual
- Click on “Create a New” in the top right corner.
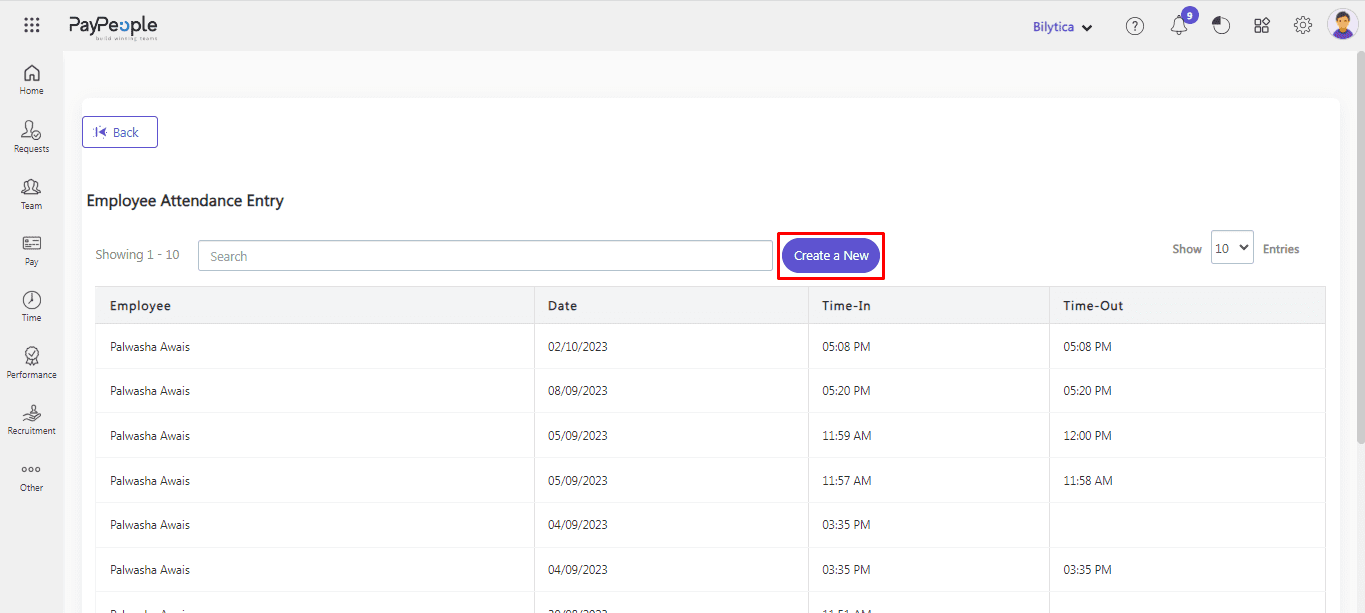
- Select the employee whose attendance you want to add manually.
- Choose the date for which you want to add the attendance.
- You can writie some note also.
- Click on the “Save” button to add the attendance.
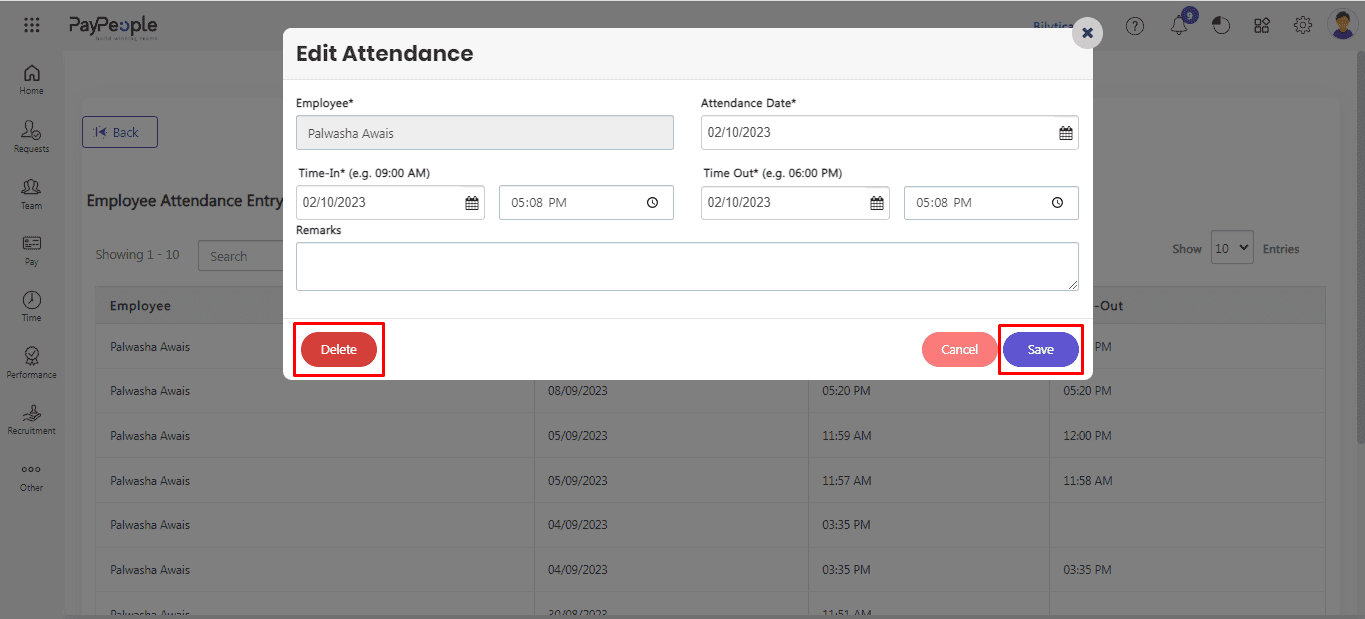
- You can also edit and delete an attendance by opening the marked attendance visible on attendance screen.
- Do the changes you want to add in attendance and click on Save.
- If you want to delete the pre-existed attendance, click on Delete.
Time Off #
Managing leave is a time-consuming and important element of the HR routine. PayPeople Time off is a simple and user-friendly online Leave management module that enables you to efficiently record, manage, and track your employee’s leave details while reducing time theft.
At Paypeople, we understand that taking time off is an important aspect of maintaining a healthy work-life balance. We have made it easy for our users to request for leave through our platform. Here’s how:
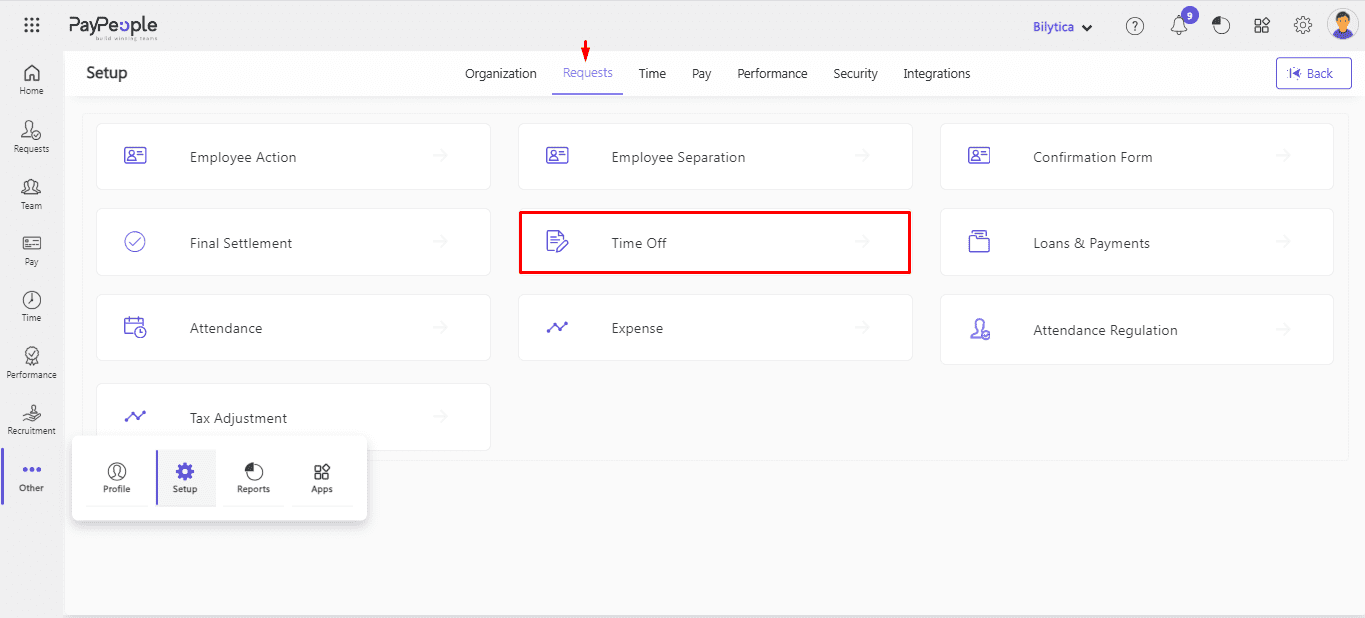
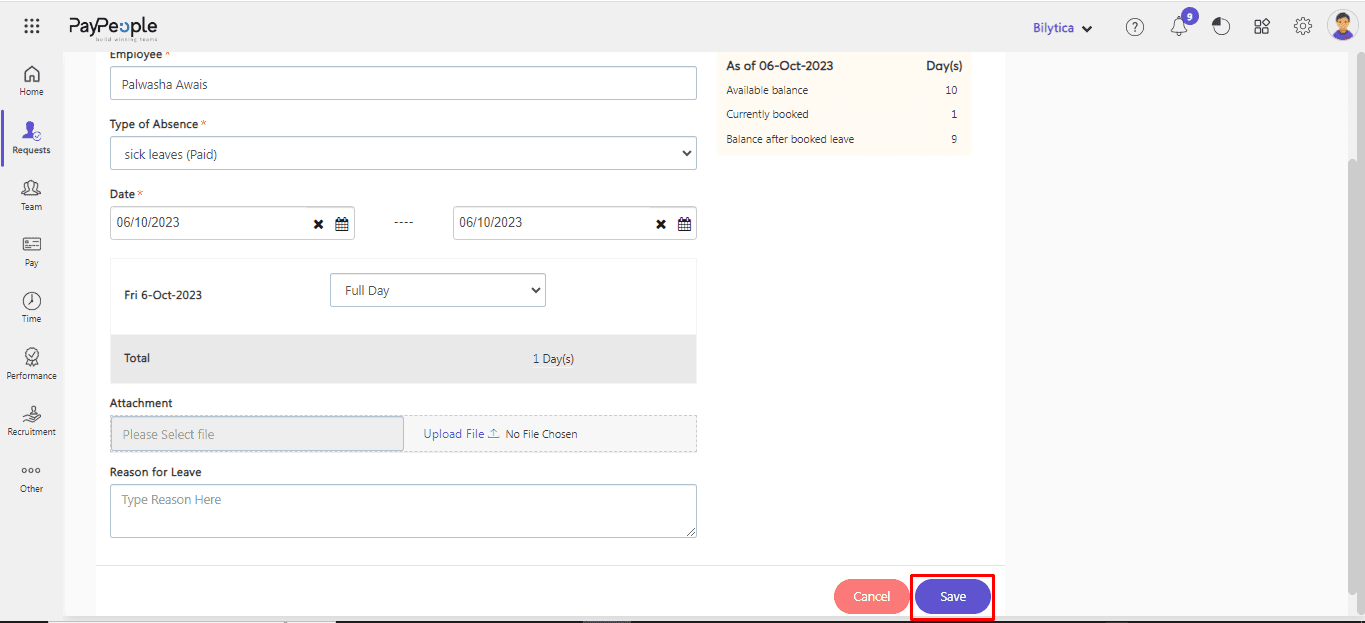
- Go to Setup >Requests> Time Off.
- Click on Add New Request

- Click on ” Leave Request”.
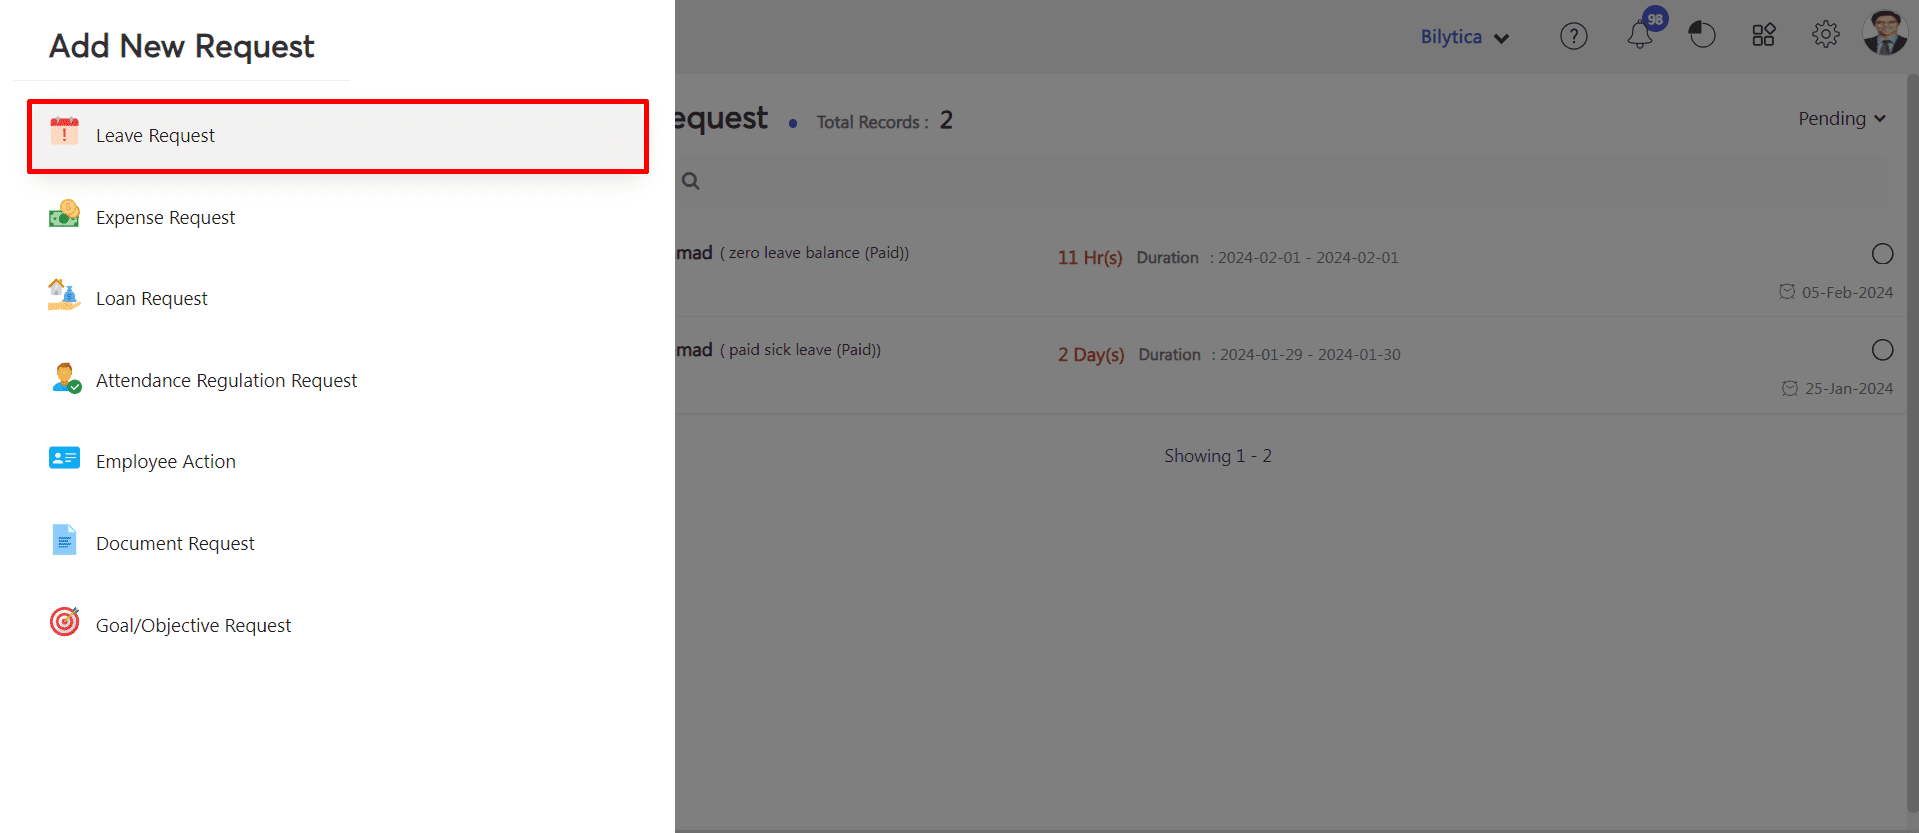
- Select employee name.
- Select to and from dates for leave.
- If necessary upload document and write reason.
- Click on “Save” button.
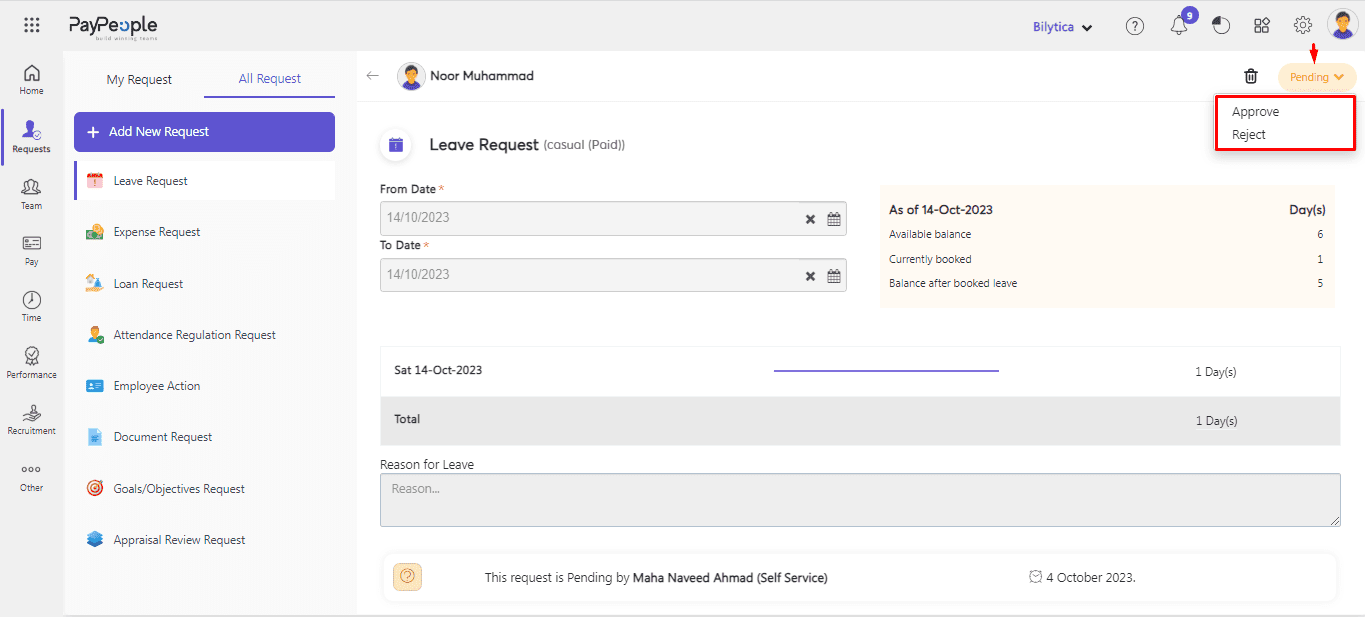
- After save the request will show on admin or manager dashboard in Pending task.

- By click on pending button you can Accept, Reject or Delete the request.
Loan and Payment #
How to add a Loan Request? #
Creating a request for a loan can be a daunting task, but it doesn’t have to be. Determine the type of loan you need: Before creating a request for a loan, it’s important to determine the type of loan you need. There are three types of loans available, such as loan, advance and Provident Fund. Here are some simple steps to follow when creating a request for a loan:
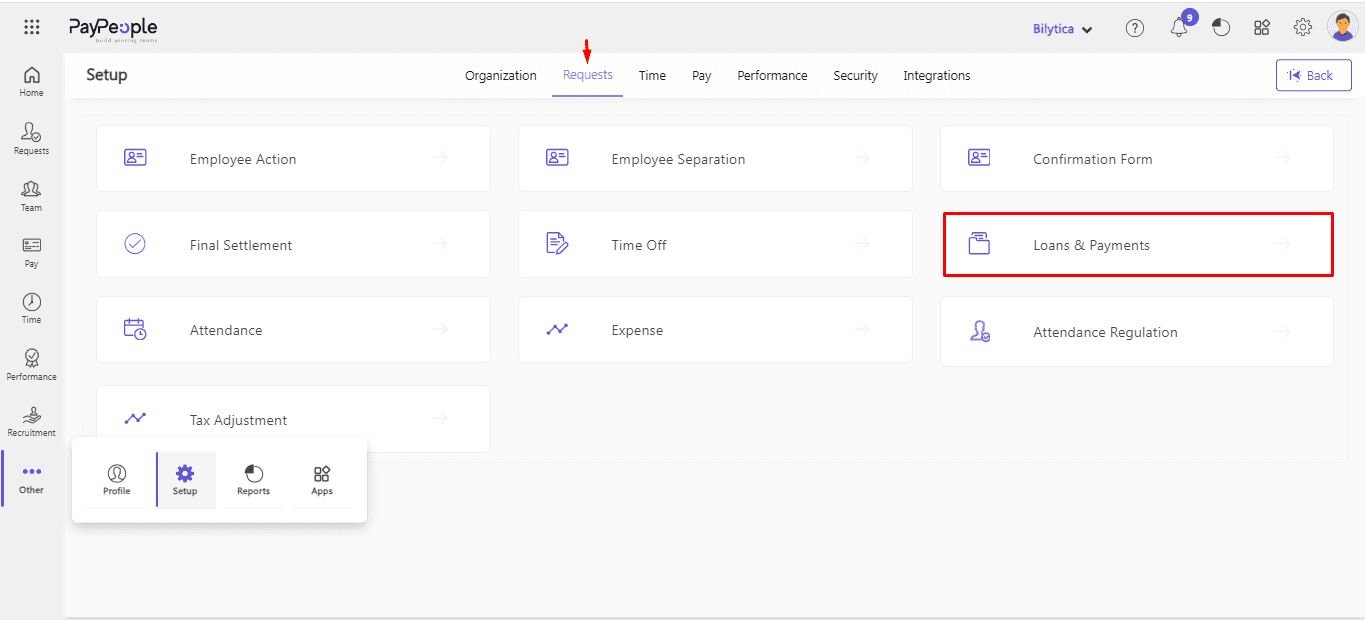
- Go to Setup >Requests > Loan & Payment.
- Click on “Create a New” in the top right corner.
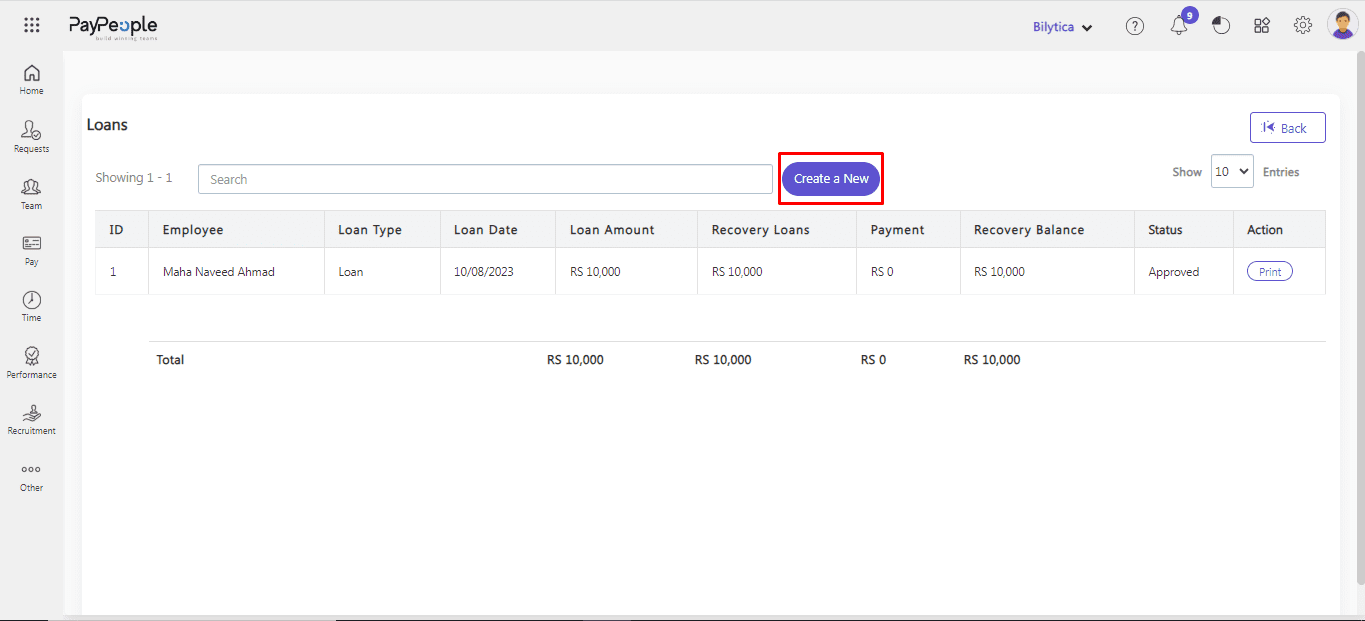
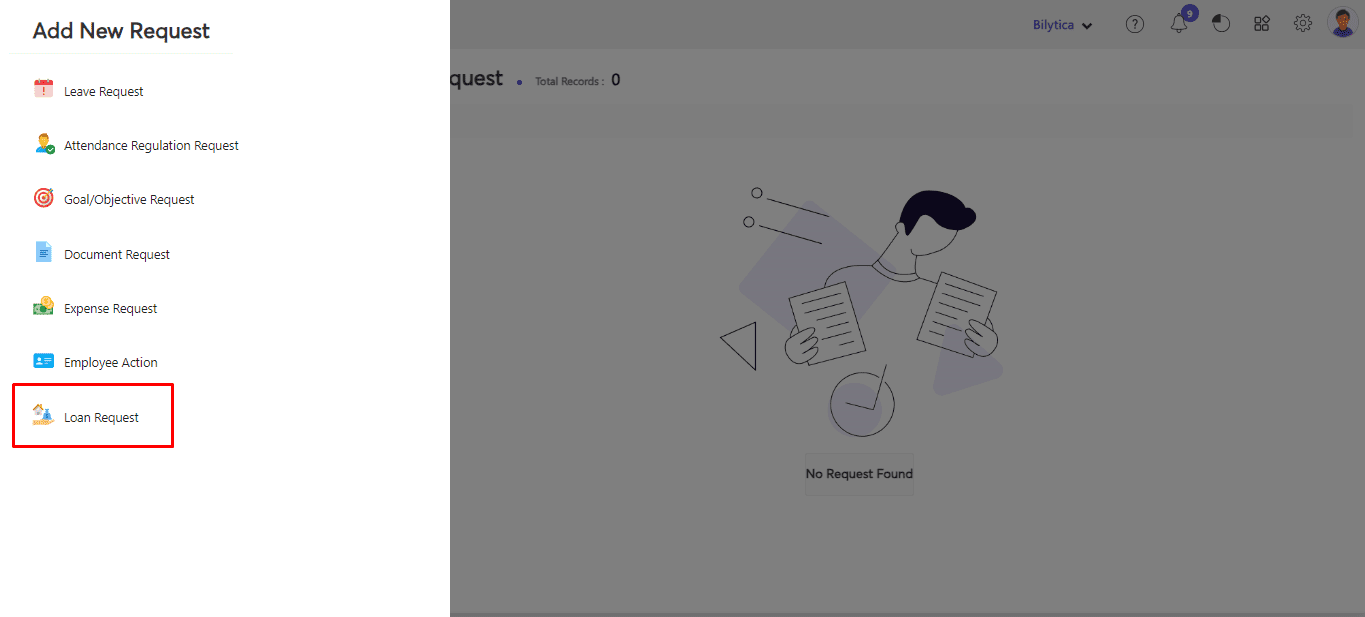
- Click Add New Request
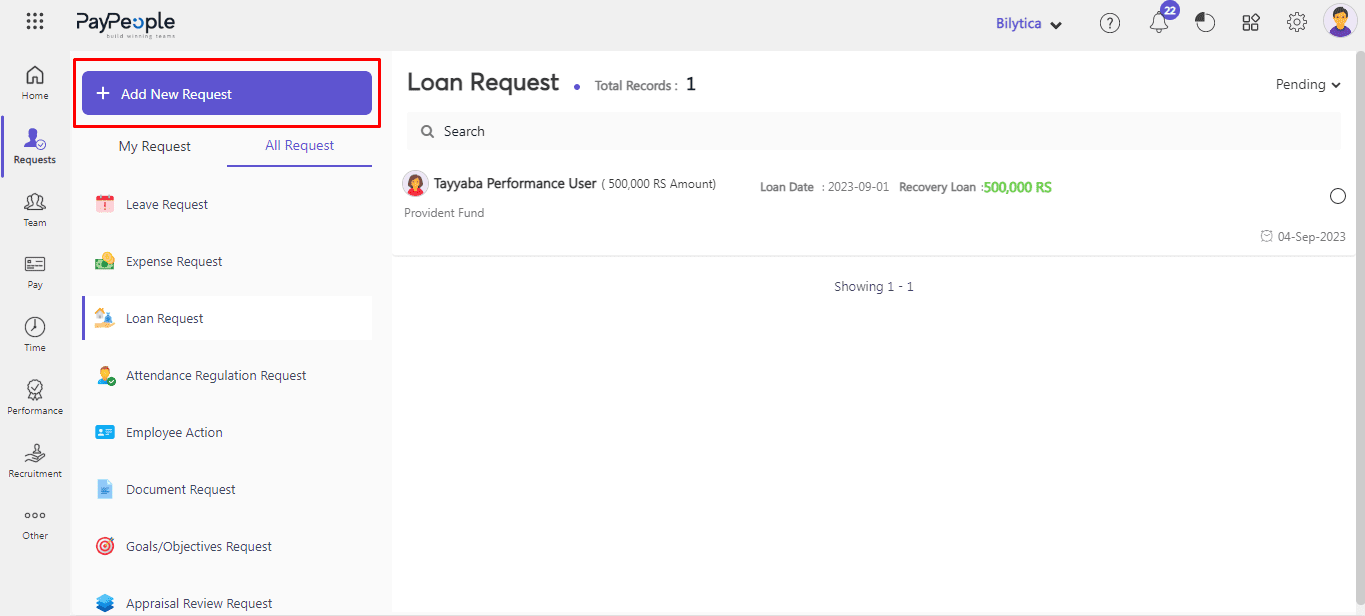
- Click Loan Request.
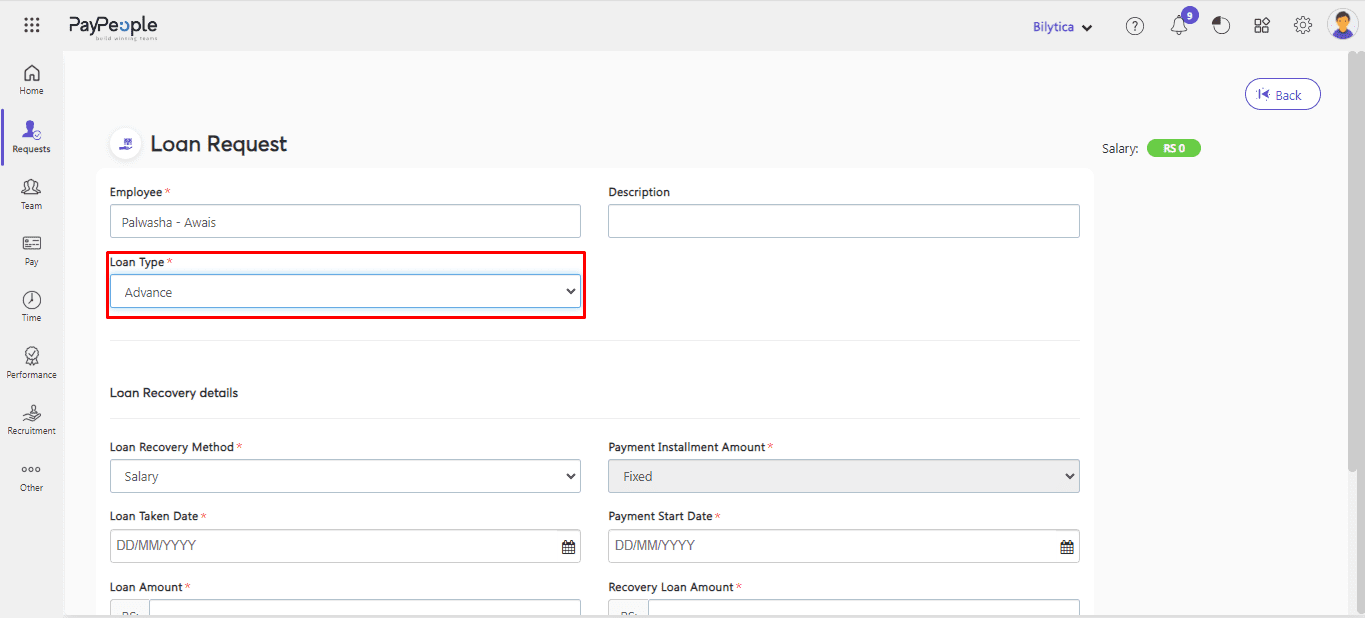
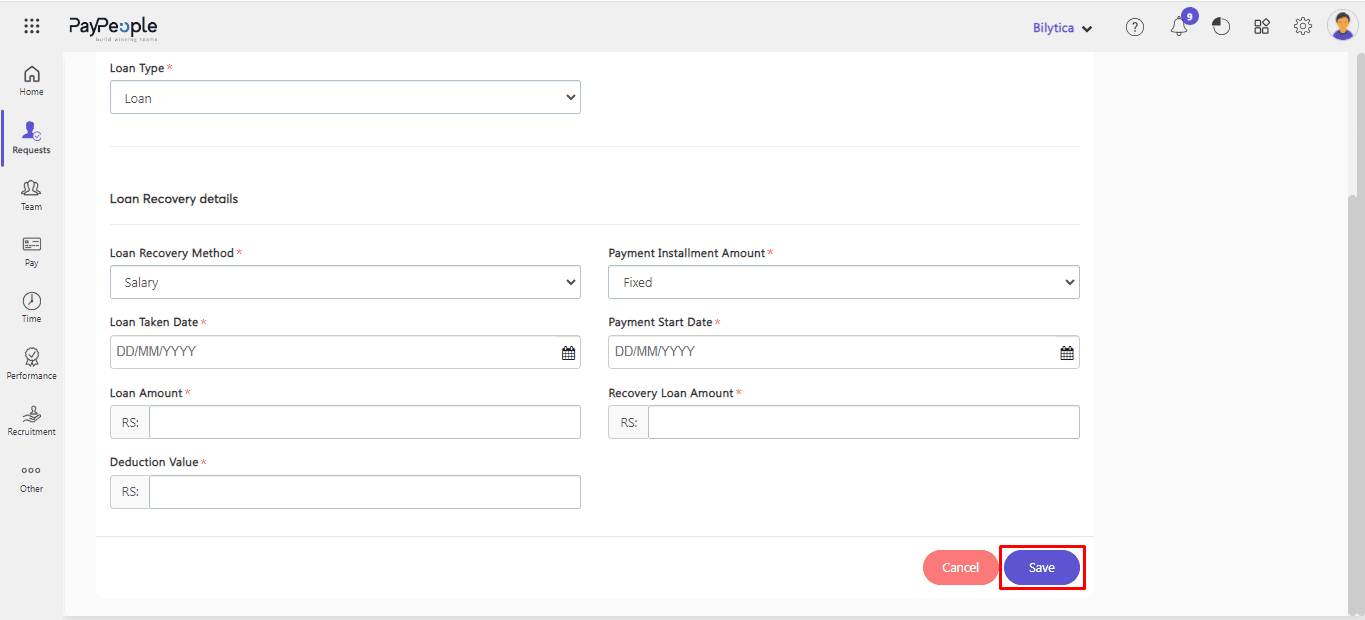
- Loan Type : Select the loan type wether it is loan, advance or Provident Fund.
Loan: #
- Select loan type loan.

Advance: #
- Select loan type advance.
Provident Fund: #
You have two alternatives here if you choose the provident fund.
- Temporary : If you select this type of PF it will deducted from your salary and your PF amount will be .
- Permanent : If you select this type of PF it will deducted from your PF amount permanently.
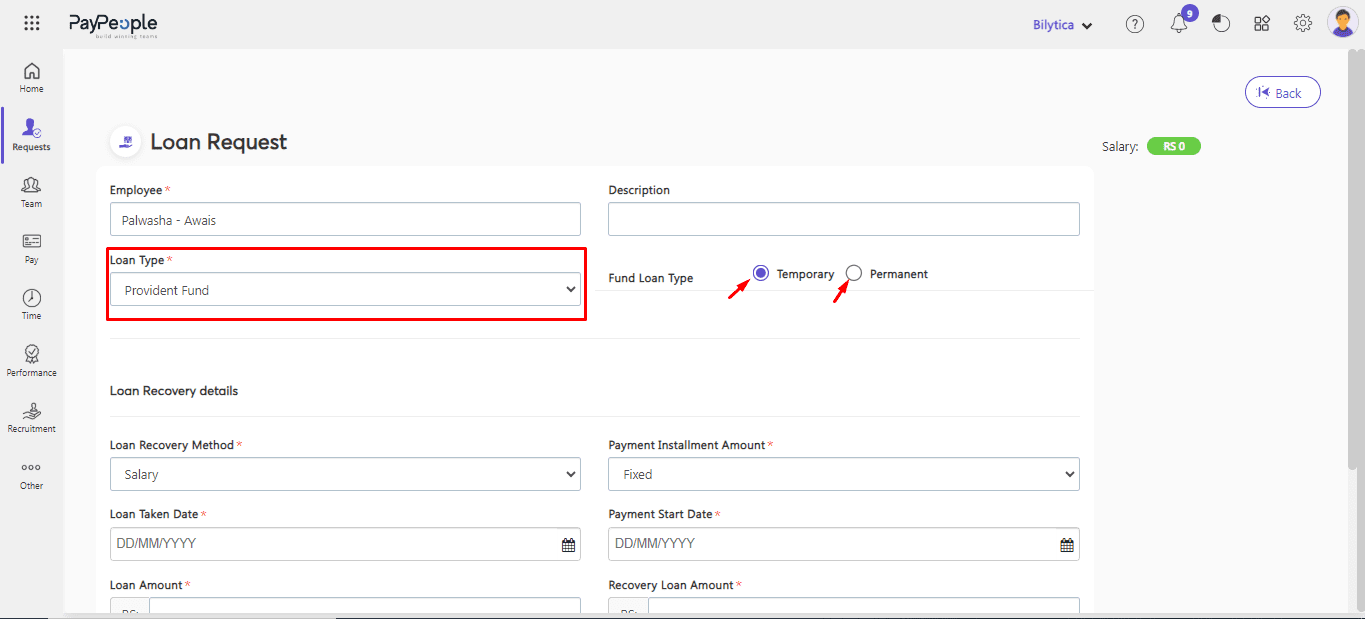
- Loan Recovery Method: Select the method of payment recovery whether to deduct from per month’s salary or by cash.
- Payment Installment Amount: Select the installment method in which you want to deduct the loan from the employee’s salary whether Fixed Amount Percentage of Basic Salary.
- Add Loan Taken Date & Payment Start Date.
- Enter the Loan Amount.
- Enter deduction value: If the deduction is in percentage(%), enter the percentage value in the “Deduction Field” Alternatively, if you selected a fixed amount in the “Payment Installment Amount” section above, enter that amount.
- Click Save button.
- After save the request will show on admin or manager dashboard in Pending task.
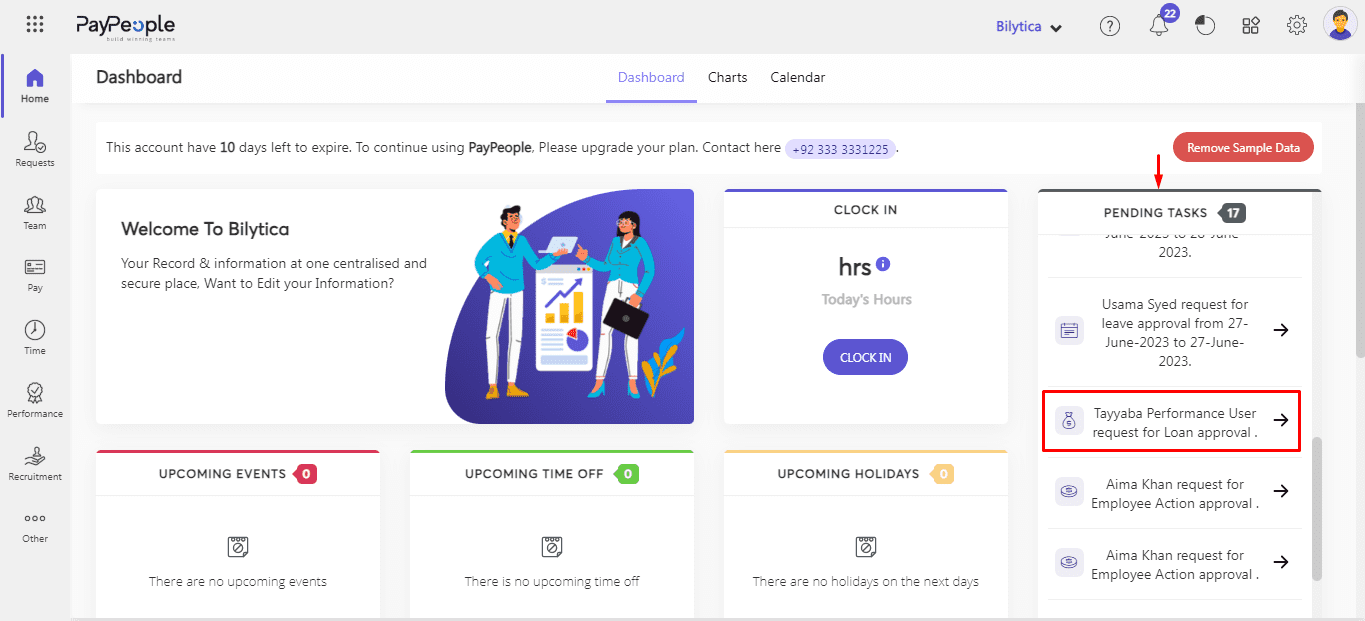
- By click on pending button you can Accept, Reject or Delete the request.
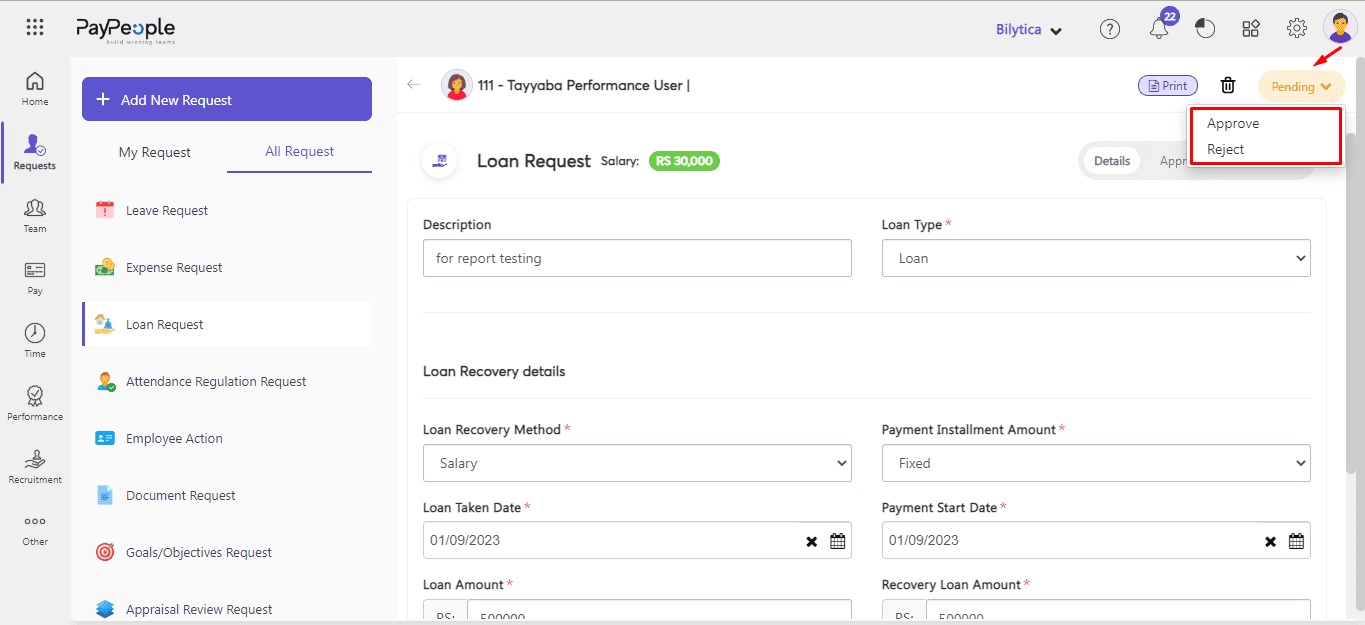
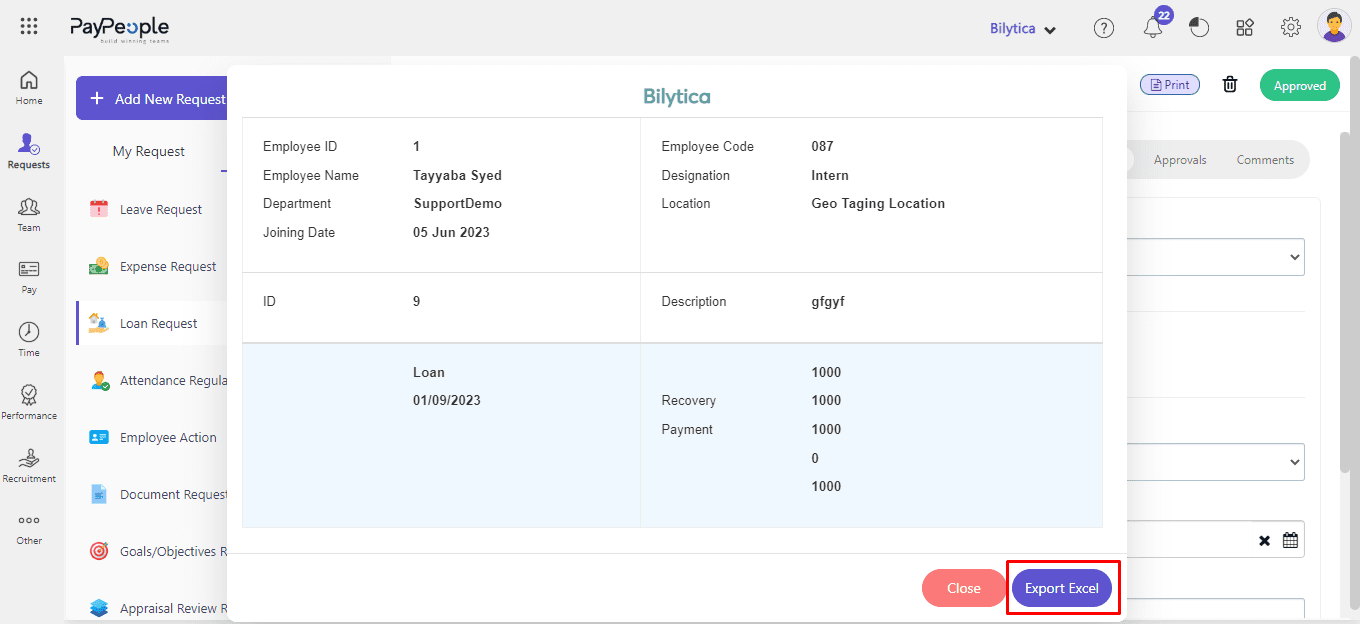
- After approved you can take print of loan request, for this click Print button.

- Download it in Excel format.
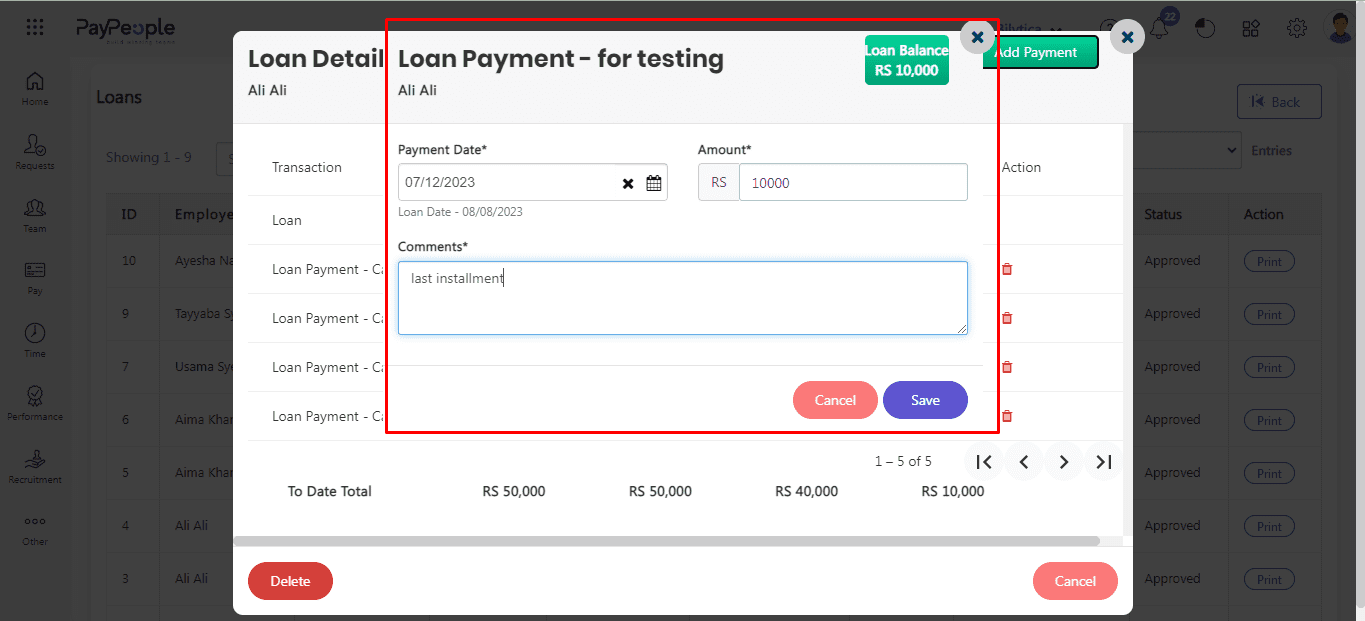
How to Add Loan Payment by Cash as Admin? #
If you are a user of Paypeople, you want to add a loan amount manually or If any employee pays a sum that exceeds the installment amount deducted from his or her salary, add that sum to the loan balance using Add Payment. Here are the steps to follow:
- Go to Setup > Request > Loans And Payments.
- Select entry whose loan you want to add.
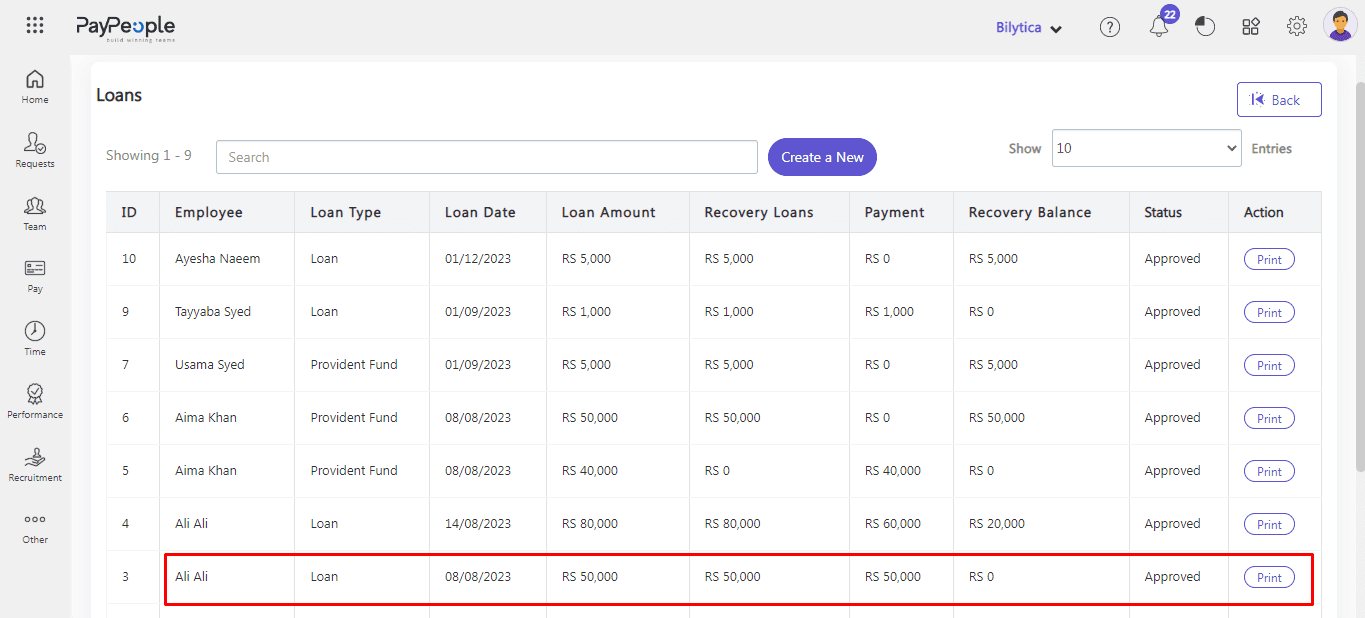
- Click on “Add Payment” in the top right corner.
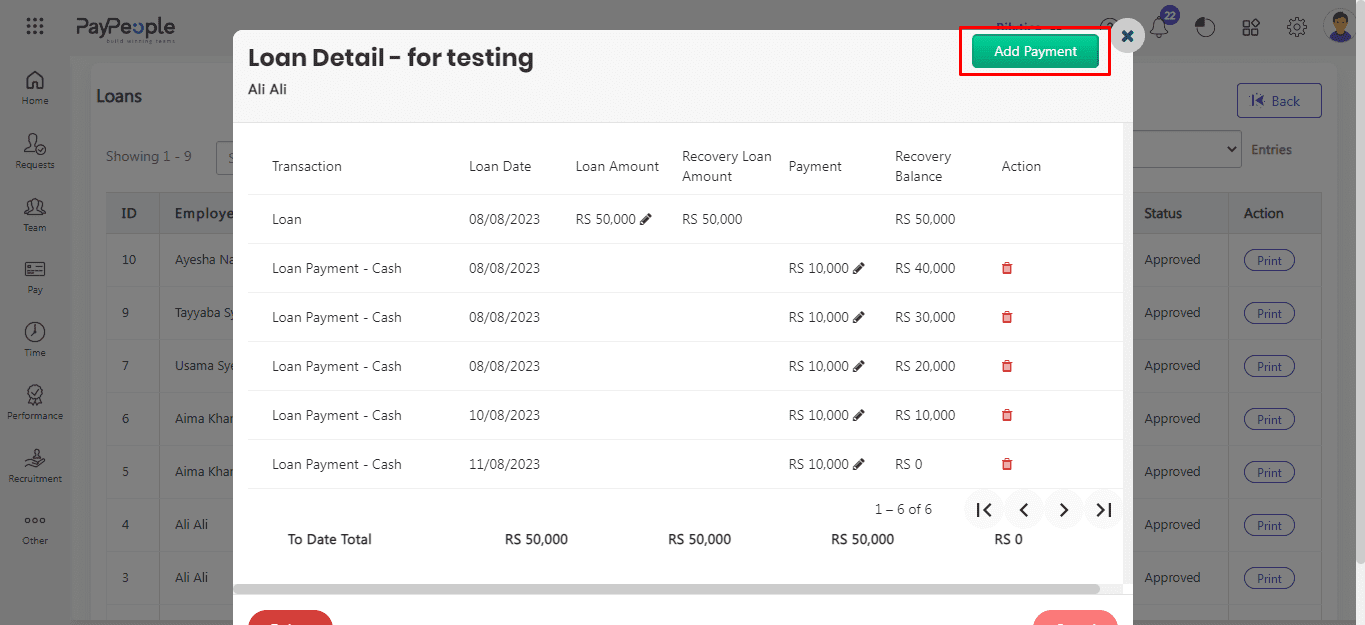
- Add date and installment amount.
- You can add description also.
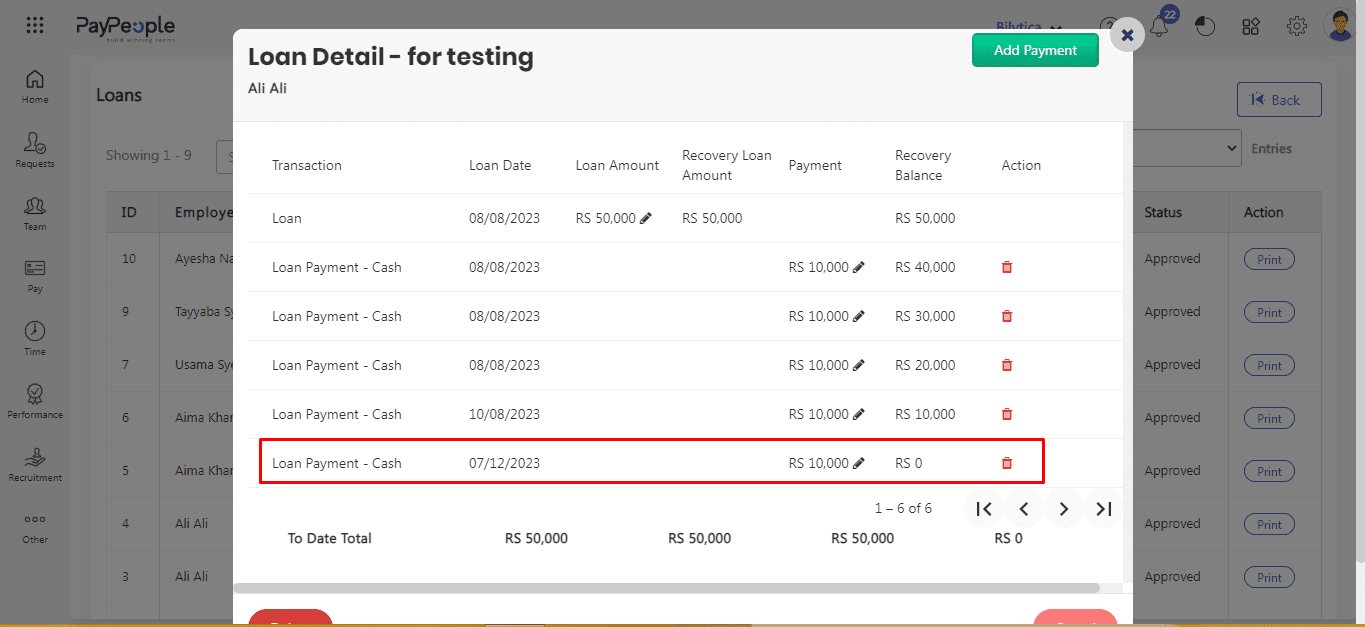
- Click Save button.
- After save it will visiblie on loan detail pop up window and employee all previous history will be maintain here.
How to View Loan Payment by Salary as Admin? #
If the loan is deducted from employee salary and you want to see his history or detail , you can easily view it. For this:
- Go to Setup > Request > Loans And Payments.
- Select entry whose detail you want to see.

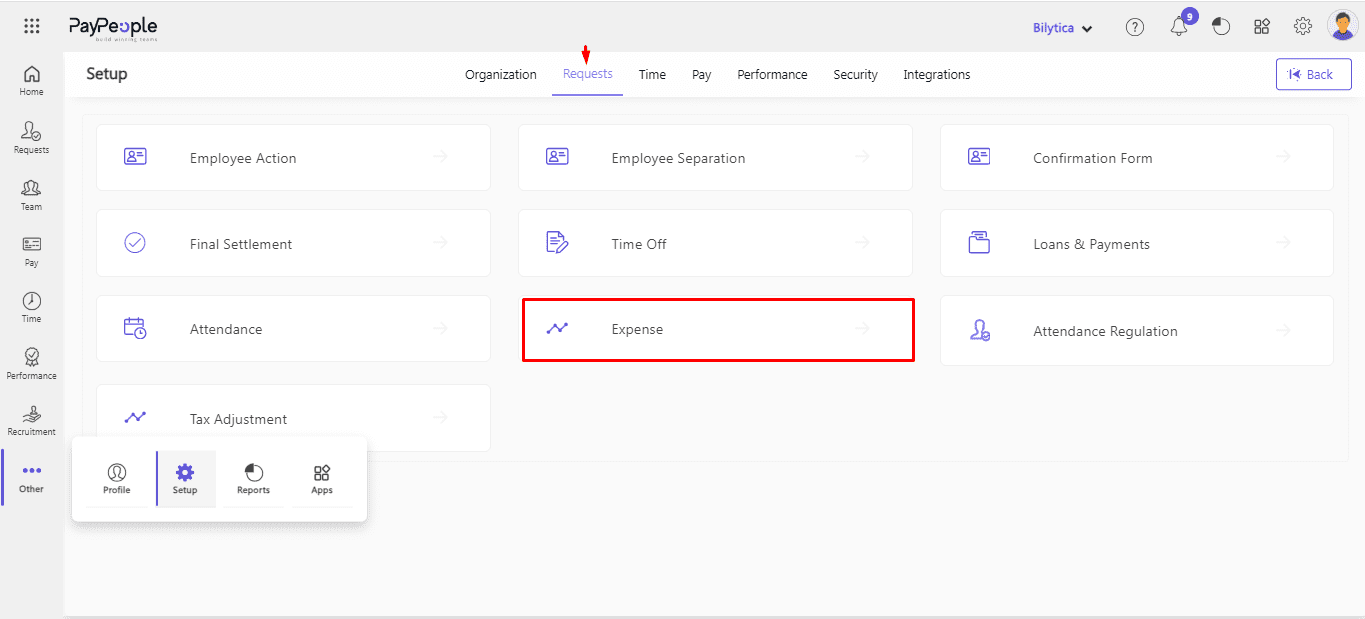
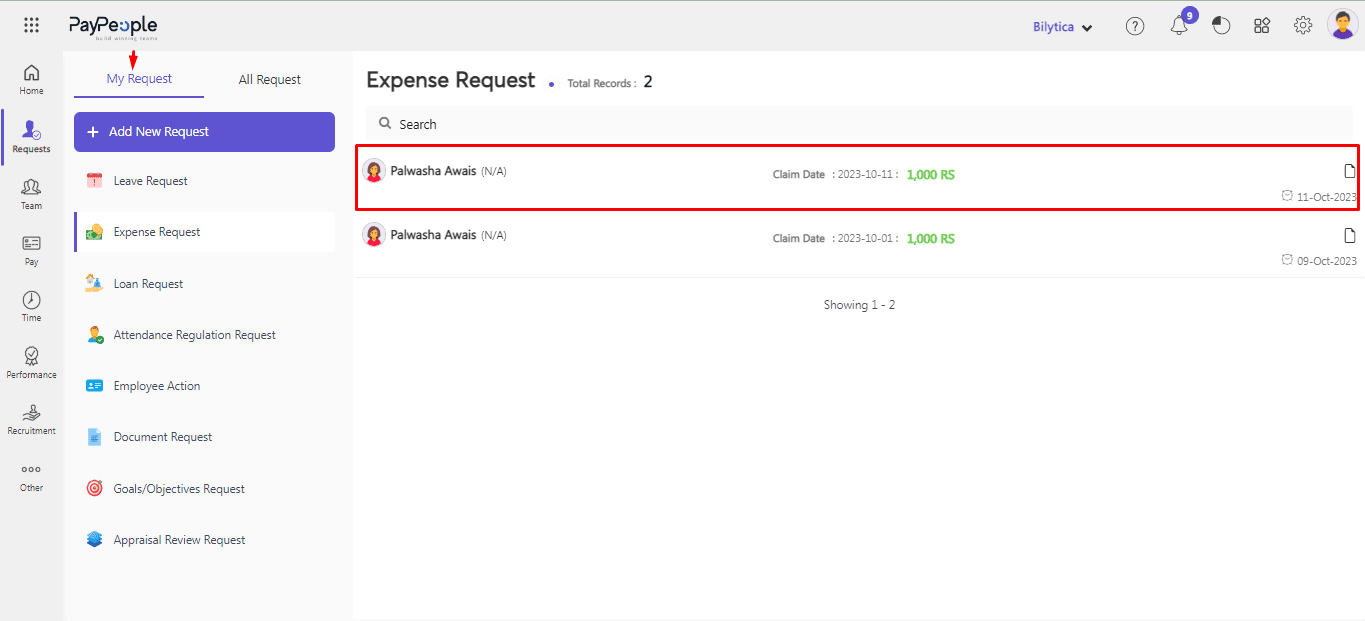
Expense #
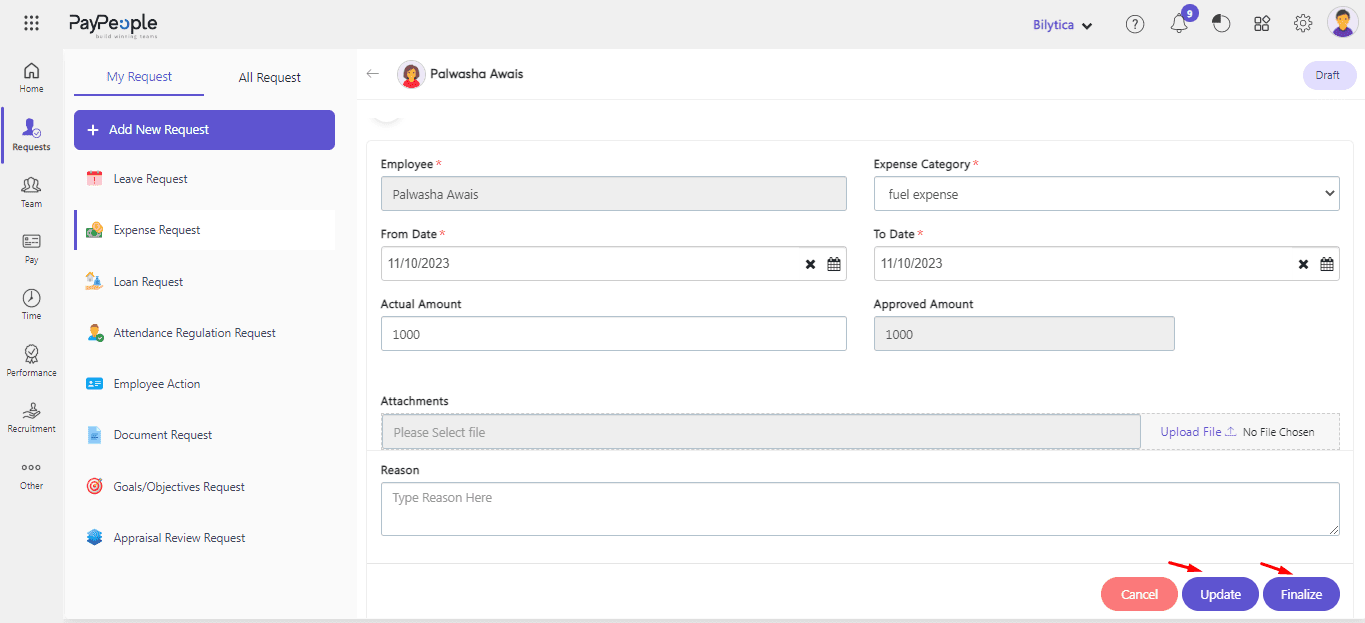
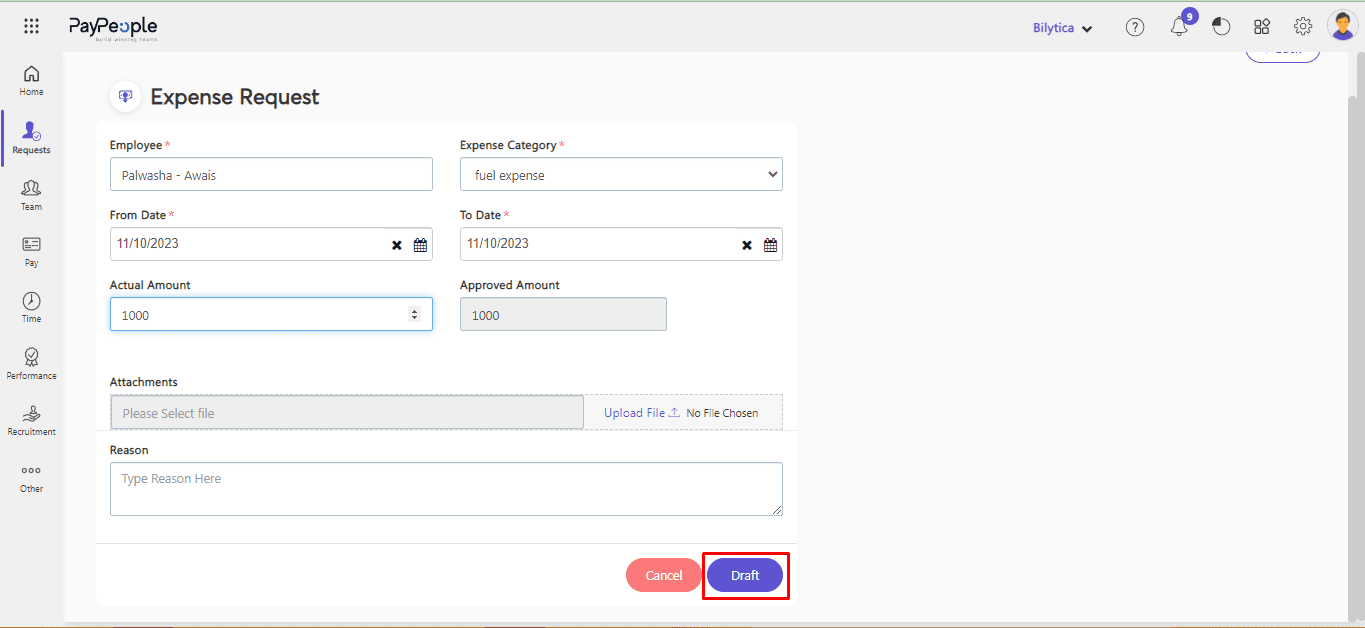
In Pay people you can submit a expense request in easiest way. For Expense Request :
- Go to Setup > Request > Expense.
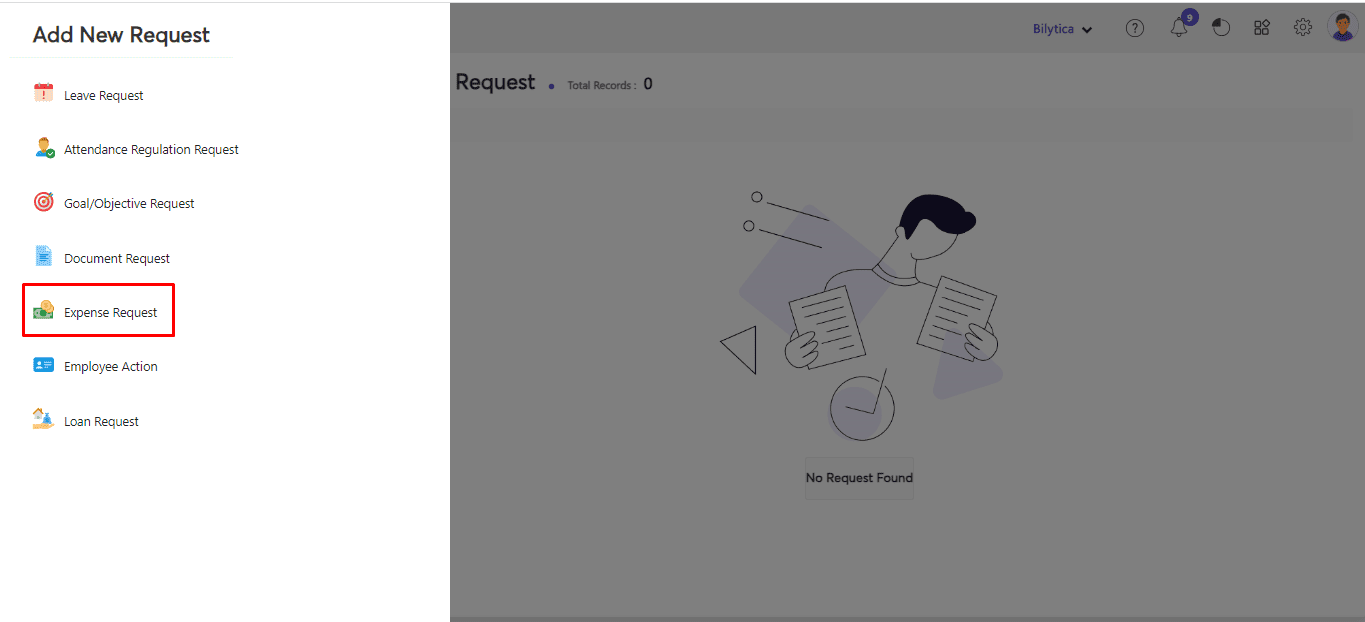
- Click on Add New Request
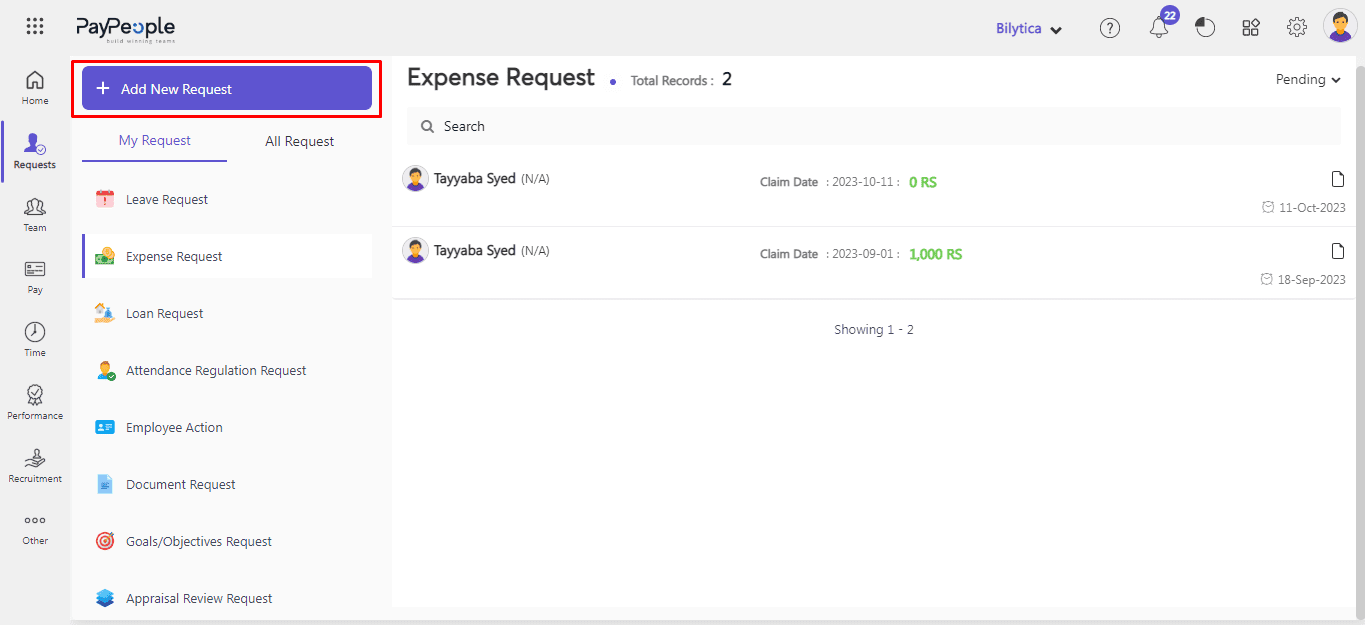
- Click Expense request.
- Upload document; containing relevant expenses such as a deposit slip, a bill, or a form.
- Expense Category: Secondly, under the Setting section, choose the expense category that you defined in Expense category in Request section.
- Employee name: In the employee name field, write the name of the employee who wants to take any expense.
- Total amount: Mention the whole amount of the expense in this field.
- Date: Have included the date that expense was issued in the date section.
- Draft: Click on Draft button.
- Go to My Request > Expense Request > Click on your Draft request
- Click on Update button if you edit something, otherwise click on Finalize button.
- Action: Higher authorities take action on it, either Approve or Reject it.